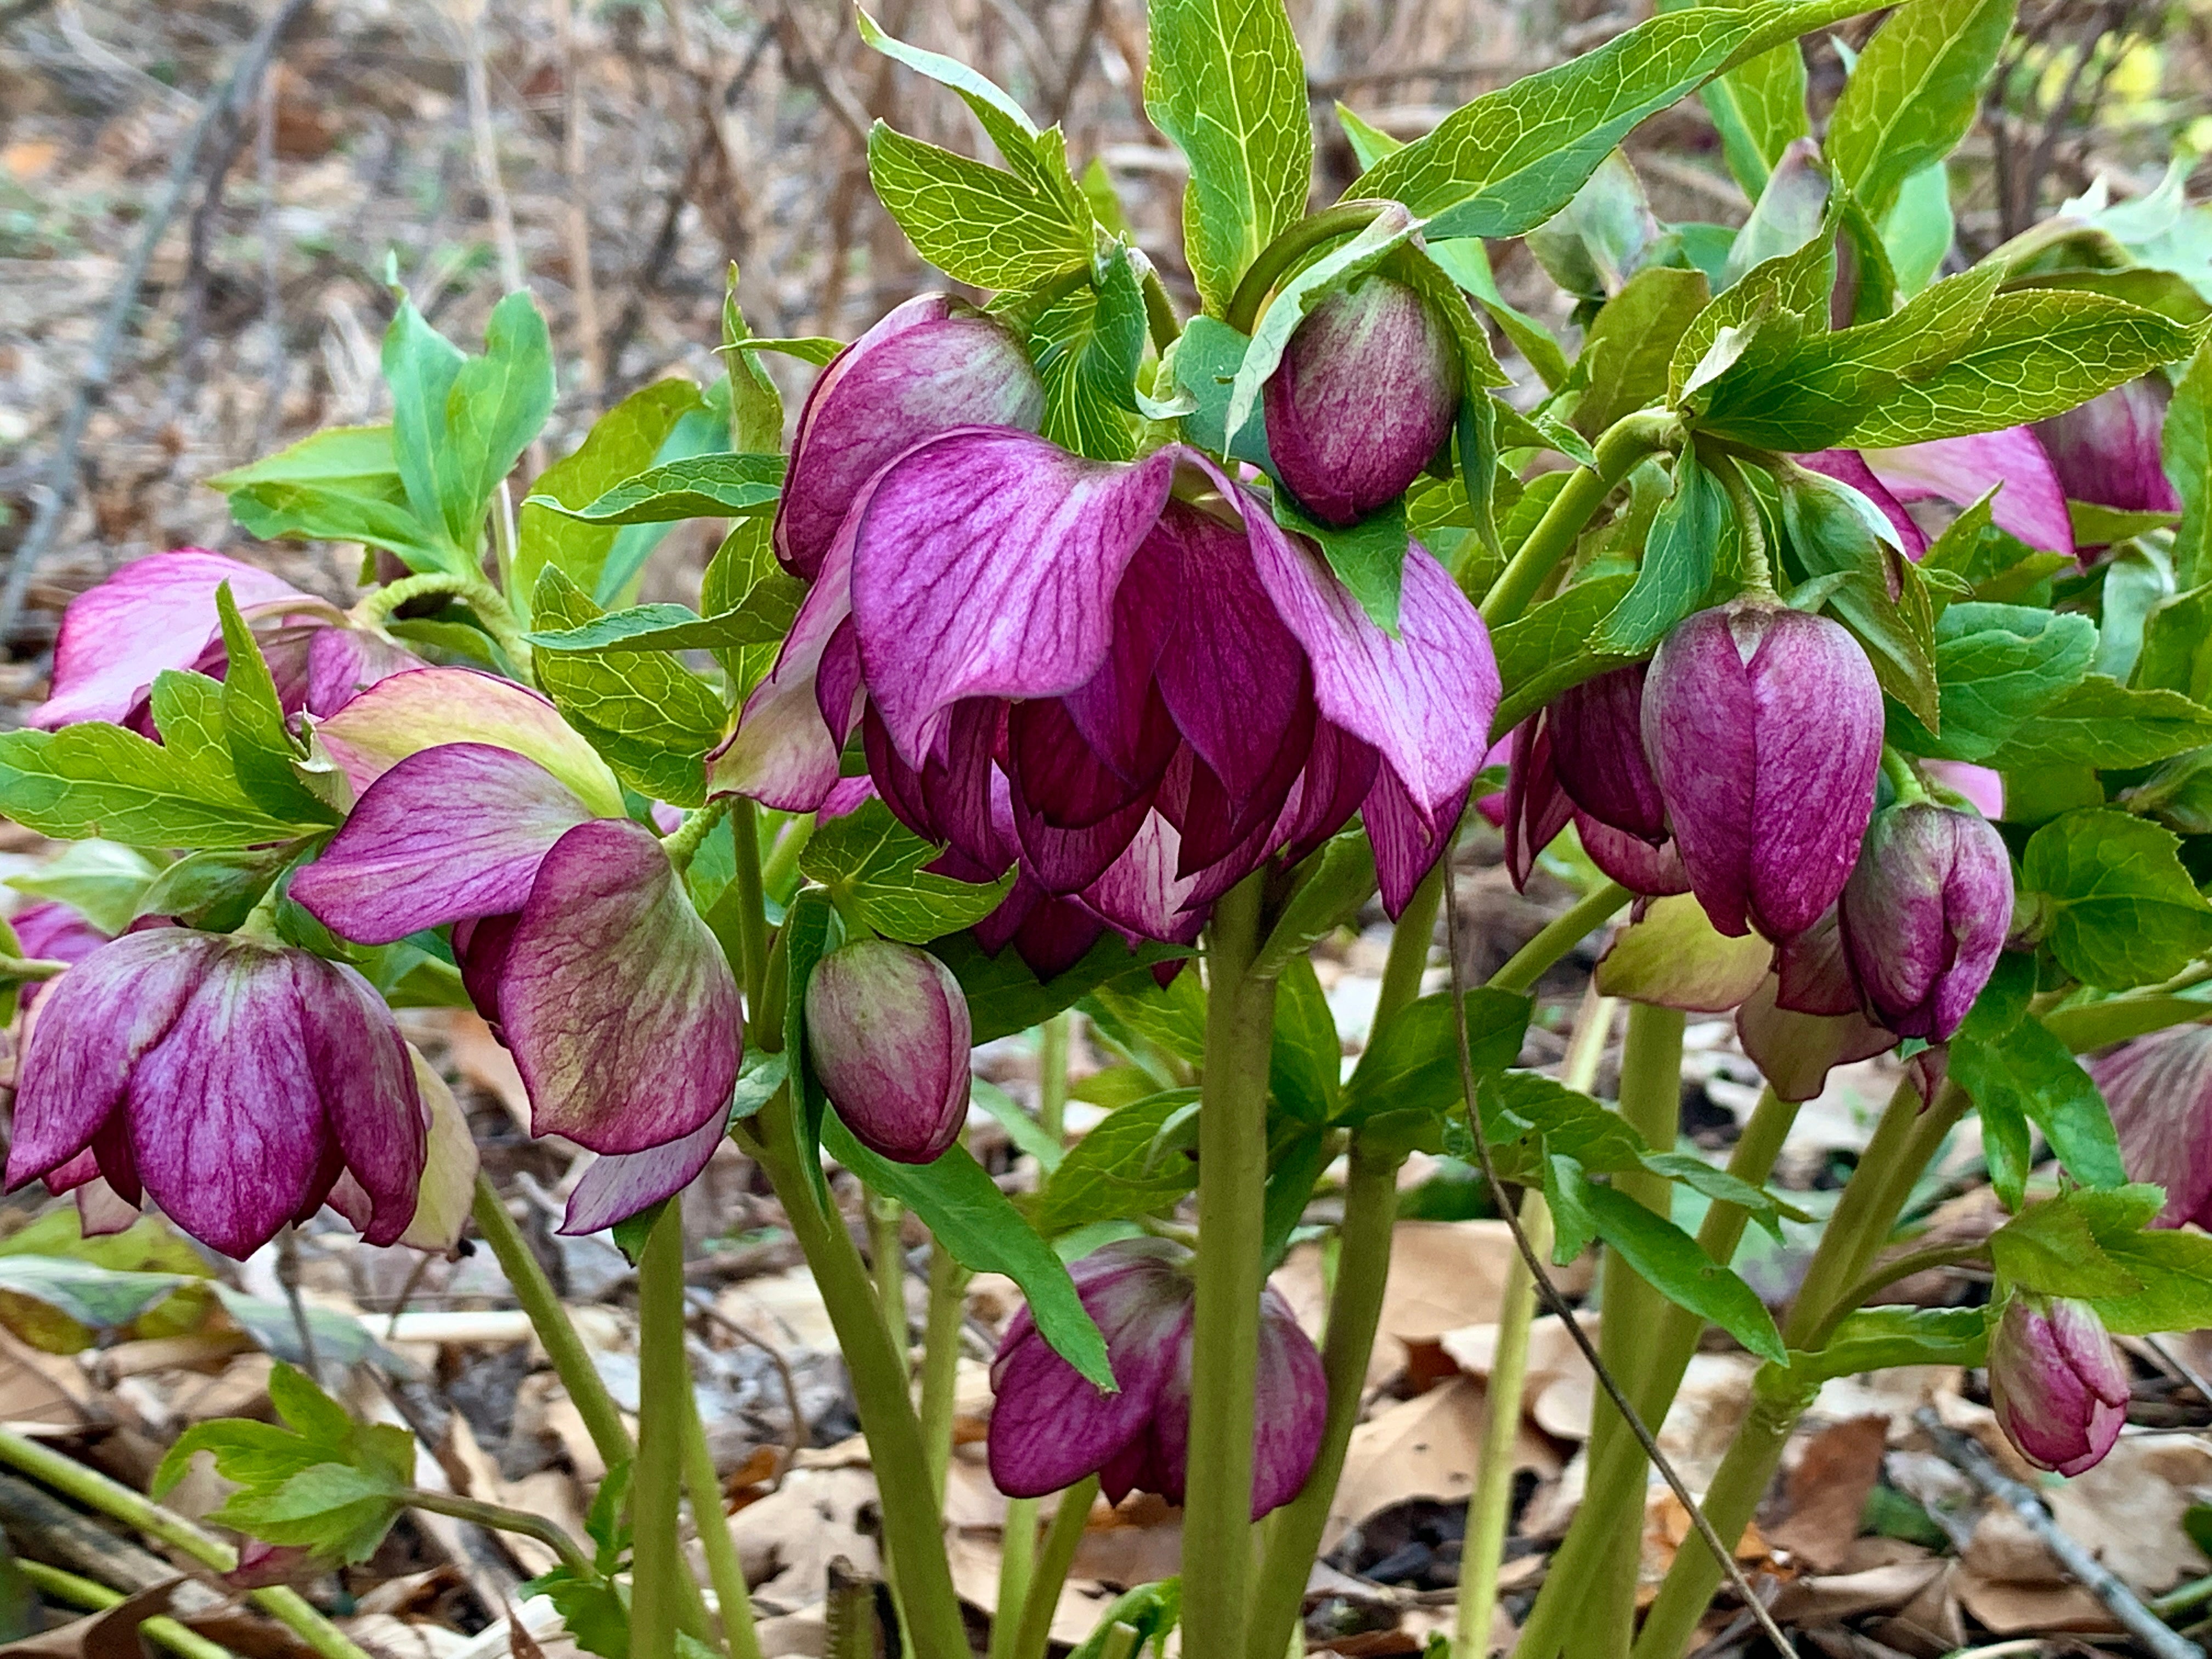
This is our recently revised handout on waking up the garden using methods that support life in the soil, pollinators, and soil fertility.
Late winter/spring cutting back and general maintenance to wake up the garden
Reset the crowns of any perennials that have heaved (lifted) out of the ground
Cut back herbaceous foliage (herbaceous means leaves that die during the winter)
Example: Burgundy leaf Heucheras
Evergreen perennials Many perennials keep their leaves (especially their basal leaves close to the ground) throughout the winter. In the spring, if the leaves look ragged, cut out or comb out the bad leaves, leaving the rest.
Examples include:
Tie up ornamental grasses first; cut down with battery powered hedge clippers or garden sickle
Perennials with a woody framework: cut back hard in early spring as soon as new growth breaks. Examples:
Summer blooming flowering shrubs bloom on new or currant year’s wood. As the new growth begins to break in April and very early May, cut back to a woody framework. Remove all dead and diseased wood. Remove crossing wood. Thin out older wood to encourage young, healthy new growth. Each shrub is treated a bit differently, but it is important to get them pruned in the early spring for the best flowering and berry set.
The list of summer blooming flowering shrubs includes: Abelia, Baccharis, Buddleia, Callicarpa, Cephalanthus, Clethra, Cornus (twiggy dogwoods, new name Swida), Heptacodium, Hibiscus syriacus, Hydragea arborescens, Hydrangea paniculata, Hypericum, Itea, Indigofera, Lagerstroemia, Lespedeza, Potentilla, Roses, summer blooming Spireas, Symphoricarpos, Vitex.
A few specific shrubs as examples:
Roses vary in their pruning techniques by classification. In general, in the spring take down the protective hills of topsoil/compost added the previous fall and spread it around the drip line of the plant. Remove all dead and crossing branches. Open up the inside of the plant by thinning out dense wood in the center. This increases air circulation. Shrub roses are pruned like other summer blooming shrubs. The severity of pruning is based on the overall size that you want the plant to attain in the coming growing season. Climbing roses are pruned to a woody framework and tied down to an appropriate support.
Thinning of new shoots: Phlox paniculata and Monarda (bee balm) are two plants that can be thinned in the early spring. Remove 1/3 of the new growing shoots to the base. This will encourage better air circulation, reduce fungus, and create fewer and larger flowers.
SPRINGTIME PREVENTATIVE MAINTENANCE FOR PERENNIALS
If your roses were badly infected with fungus last year, consider clean cultivation beneath them. Remove all of last year’s mulch and discard. After adding compost and fertilizer, keep the area below them clean, cultivating regularly. Although mulching is ideal, old mulch can harbor fungus spores that will splash up on the plants. Always open prune your roses in spring and again in mid-July.
If Japanese beetles were a problem last year, begin this year spreading granular grubGone. This will gradually reduce and eventually eliminate the Japanese beetle grub population. As soon as Japanese beetle season arrives, immediately spray the plants with Neem oil at dusk. This acts as an anti-feedant and makes the plants distasteful to Japanese beetles.
Hollyhocks are very susceptible to rust. Once rust is established in your garden, it can easily spread to New England asters. It is best to dig out old hollyhock plants (3-4 years old), removing them completely from the garden and regularly replacing them with young seedlings. Hollyhocks are technically biennials, but they actually live for many years. Older plants are weaker and much more susceptible to disease. If rust was a problem last year, you must keep your plants clean. Remove any infected leaves immediately. Spray with copper as soon as the leaves emerge to help prevent rust from reappearing and spreading.
Be sure to cut down all German or bearded iris foliage to the ground the minute you walk into your garden in the spring. You should NEVER leave it up during the winter as that is where the borer larvae overwinter. By simply eliminating the overwintering larvae, you will eliminate the problem without chemicals. If you suspect borers (watch for vertical tunnels in the foliage), squeeze the tunnels with your fingers. If you have a serious problem, mark on your calendar to divide 3-5 year old stands of bearded irises in August.
WHAT ABOUT THE LEAVES?
Whenever possible, leave the leaves in the garden beds. They are home to myriad creatures including the larval stages of many butterflies and native insects. You can mulch right over a thin layer of decomposing leaves or, if there are enough leaves, you can skip mulching all together. As the leaves break down, they feed the soil. If you are adding compost and organic fertilizer to the garden beds, you can do so right on top of the leaves.
If leaves are so thick that they are covering the crowns of the plants or preventing early spring bulbs or early perennials from emerging, then gently rake them off. If at all possible add them to a compost pile or re-use them somewhere on the your property.
]]>The topic of sustainable floristry has been swirling around in my mind for a while now. This holiday season, Natureworks has decided to take action to make our floral design work better for the planet. For the past few weeks, all of our designers have been experimenting with FibreFloral Design Media, a degradable brick made from all natural, volcanic basalt rock that has been spun into fibers (shown below). We tested it with evergreens and fresh flowers and have decided to offer it as a sustainable option to anyone who orders an arrangement from us this season. It is more expensive than a brick of traditional floral foam, but everyone I have talked to said they would be happy to pay a bit extra. It turns out that the green Oasis floral foam we have all used for decades not only doesn't biodegrade, it also contains microplastics.
It took me a little while to get used to working with this new material. It has a softer texture that Oasis. Stiff stems like evergreens and mums slide in easily. Softer stems need help by poking a hole with a stick. It slowed me down at first but then I got used to it. FibreFloral Design Media soaked up water really fast and held onto it well. Many days later, everything is hydrated and happy in my arrangement. I have to cut FibreFloral with a serrated knife. No problem there. I love the fact that when my arrrangement is done, the ENTIRE THING can be composted. The mineral-based foam will break down slowly, but it WILL break down.
Above you can see the arrangement I made using the FibreFoam. It contains Scotch pine, Green Giant arborvitae, white pine, Scotch broom, and Boulevard cypress evergreen foliage. I played around with herbs such as sage and even parsley flowers (I had to poke a hole for the parsley stems). Then I added flowers that were still blooming in my November garden- perennial mums, monkshood, and Aster 'Ezo Murasaki'. I included the deep burgundy red leaves of Itea (Virginia sweetspire) to add depth.
I have also been experimenting with other methods to make fresh arrangements without Oasis. Most are old fashioned and still work just great. For my entire career in horticulture I have been collecting forms, pin holders, and floral "frogs" made of glass along with vintage vases and containers. You can see one of my prize possessions, a very large, metal form that happened to fit perfectly in this beautiful blue bowl. I used it as a model and then took my father's tin snips and cut a piece of chicken wire, molding to fit the bowl.
With that done, I added water to the bowl and started arranging. Using this method I realized that anything goes when it comes to fresh material- the softness of the stem didn't matter. I began by adding foliage and then added flowers.
What fun I had! I used shiny green leaves of my Epimedium 'Domino'. I picked fresh kale and lemon balm, lots of perennial mums and asters, calendula blossoms, Sanguisorba (the elongated red flowers). I added Ilex crenata, boxwood, white pine, and native Chamaecyparis thyoides (Atlantic white cedar). The burgundy leaves are little branches from my oakleaf hydrangea which is a very deep burgundy red at this time of the year.
One thing I realized is that if you pick this arrangement up to move it, the water can easily splash out. So, when traveling with it, I would dump out excess water, pack it in a box with some towels, and be sure to refill the water when I arrive at my destination. Next time I would tape the chicken wire form down with thin, waterproof florists tape so it won't slip around..
Next I selected a footed glass container and found a glass floral arranger that I have had for years. They matched together perfectly.
I added water but only after I did so did I realize I should have secured the glass arranger with a piece of florist's clay. Next time I will. Florist's clay is sticky and totally waterproof and will keep the arrangement from moving around or falling out. Working with this form is a bit different as you have to stick the stems in the holes. But once I got the hang of it, I moved right along and it came out very pretty.
What I love about this method is that, in a clear glass container, all you see is the stems. If I had used Oasis, it would have stood out and looked strange.
This arrangement contains the dried seed heads of Sedum 'Autumn Joy', a mixture of my late blooming perennial mums, and some fresh cut evergreens. It is sitting on my dining room sideboard as I write this, many days later, looking as fresh as can be!
My last arrangement was made using a metal pin holder, also called a floral "frog". As you can imagine, I collect these too! I found a cute, burgundy red container that the pin holder fit into. Again, I should have secured it with floral clay. Then I made a simple arrangement of Japanese umbrella pine (Sciadopitys), white pine, Green Giant arborvitae, the red stems of blueberry and shrubby dogwoods, and culinary sage.
Adding water to this arrangement is so easy and I expect it to last for many weeks and fill my kitchen with seasonal beauty.
Sometimes the old ways are the best! AND, embracing new technologies and products manufactured with the health of our planet in mind gives me great hope for the future of sustainable floristry.
Most of the taller Eupatoriums benefit from pinching in June to make them fuller and to help avoid having to stake them. You can also pinch half of the plant to double the bloom time or pinch 1/3 of the plant in early June and 1/3 of the plant in late June to triple the bloom time.
All Eupatoriums will self-sow, some more rampantly than others. If this becomes a problem, deadhead them after blooming before their seed pods ripen (turn fluffy).
Who was Joe Pye?
Some researchers believe he was a native American Mohican sachem (chief) named Schauquethqueat who lived in Stockbridge, MA from 1740-1785. He took the Christian name Joseph Pye. Legend has it that he used the plant for medicinal purposes in his community.
***Note that many of the Eupatorium scientific names have changed. The new names are in parentheses. It is very important to know this as many people study lists that use the new names.
Eupatorium coelestinum (Conoclinium coelestinum) -Perennial ageratum
Northeastern US native
Rhizomatous, makes an excellent taller ground cover/green mulch.
Late to emerge in spring. Excellent choice to plant with spring blooming bulbs or early blooming perennials.
Grows 2-3’ tall. Excellent cut flower. Bloom August thru early October.
‘Wayside’- a more compact, shorter variety growing 18-24” tall
Eupatorium dubium (Eutrochium dubium)- Joe-Pye weed
Northeastern US native
Huge heads of mauve-purple flowers. Grows 3-5’ tall. Flat flower clusters. The best choice for near the seashore as it is salt tolerant.
‘Baby Joe’-compact form, 2-3’ tall and 1-2’ wide. Flowers are magenta-purple.
‘Little Joe’- compact form growing 3-4’ tall and 1-3’ wide. Stiff, upright habit, light lavender flowers
'Mask'- A compact form growing 28-40" tall. Domes of pink flowers and purple stems make this a great choice for containers or smaller gardens.
Eupatorium fistulosum (Eutrochium fisulosum) – Hollow Joe-Pye weed
Northeastern US native
Stems are hollow and purple tinged. Stems are primarily smooth with very few hairs.
Large dome-shaped heads of lavender-pink flowers are dome shaped. A large growing plant reaching 4-7’ tall. Leaves are long and strappy, usually 5 or more per whorl.
Eupatorium fortunei
Native to Asia
‘Pink Elegance’- Green and white variegated, pointed foliage. Fuzzy pink flowers in September. Flowers are very attractive to pollinators. 3-4’ tall
‘Pink Frost’-Japanese Joe Pye weed has variegated green and white leaves. Deep pink flowers in September. 2-3’ tall.
Eupatorium hyssopifolium- Hyssop leaf thoroughwort
Northeastern US native
Thin, more delicate textured leaves. Flat-topped umbels of white flowers on 3-4’ tall stems. Benefits from a hard pinch in June to avoid flopping. Grows best in full sun and well-drained soil.
Eupatorium maculatum (Eutrochium maculatum) - Spotted Joe-Pye weed
Northeastern US native
Stems are purple spotted and pubescent (hairy). Flat topped flower clusters of lavender-pink. Straight species will grow 5-8’ tall. Often found growing in wetlands
‘Atropurpureum’- will grow 2-5’ tall depending on moisture in the soil. Large domes of lavender-purple flowers with a silvery effect to the blossoms.
‘Euphoria Ruby’-Short, compact, well branched plant growing only 2’ tall. Very floriferous with mounds of darker reddish-purple flowers.
‘Gateway’-Giant, stately, tall plants can grow 7-10’ tall with flowers the size of bushel baskets. Benefits from a hard cut back in June.
‘Purple Bush’-Dark lavender-purple flowers on 5’ tall plants.
Eupatorium perfoliatum- Boneset
Northeastern US native
Perfoliate or clasping leaves, white flowers
Grows 2-4’ tall depending on the amount of moisture in the soil. August-September blooming
Eupatorium purpureum (Eutrochium purpureum) -Sweet Joe-Pye weed
Northeastern US native
Stems purple at the nodes only (where the leaves connect) and not hollow. Stems are primarily smooth with very few hairs. Leaves are matte in texture, usually 3-4 in a whorl. Flowers are dome shaped and slightly fragrant. This is the most drought tolerant Joe-Pye weed and can be found in partially shade, upland woods. The straight species is 4-7’ tall, 2-3’ wide
‘Little Red’- a compact form with rich rosy-pink domed flower heads. Grows 5-6’ tall.
‘Ruby’- Very compact variety topping out at 3’ tall. Flowers are rosy-pink and vanilla scented.
Eupatorium rugosum (Ageratina rugosum) -White snakeroot
Northeastern US native
This plant is poisonous. It self-sows prolifically and can take over a garden area. Will grow in partial shade or sun.
‘Chocolate’ has purple leaves and white flowers. It has the best purple color in full sun. It will self-sow but many of the seedlings will have green leaves.
]]>
Pycnanthemums are mountain mints, one of the most important native perennials we can add to our pollinator gardens. Their flowers are relatively small and white (occasionally dotted with purple or pink). They produce a lot of nectar for our pollinators and often you can see many different bees, wasps, moths, beetles, and butterflies on the plants at the same time. The foliage has a lovely minty fragrance and this plant is not eaten by deer or other mammals. Pycnanthemums are ideal to plant in or around your vegetable and flower gardens to attract a lot of pollinators.
Pycnanthemum flexuosum- Appalachian mountain mint
A southeastern U.S. native. White star-like, very showy, globular flowers in clusters atop 2-3’ stems. One of the slower spreading mountain mints, great for smaller pollinator gardens. It will eventually form a clump 2-3’ wide.
Pycnanthemum muticum- Smooth or short toothed mountain mint
A northeastern U.S. native. 2-4’ tall plants have large silvery bracts with a cluster of tiny white flowers in the center. Despite the small size of the actual flowers, this mountain mint is constantly covered with all kinds of pollinators, big and small. Stems, bracts, and flowers can be wired to a wreath ring, laid flat to dry, and will form the base of a beautiful herbal wreath. Fast spreading by rhizomes. Full sun or partial shade. Winter seed heads should be left up and are very attractive.
Pycnanthemum tenuifiolium- Slender mountain mint
A northeastern U.S. native. Fine textured, needle-like foliage and white flowers that start blooming early, in June, making it a great plant to extend the mountain mint succession of bloom in your pollinator garden. 2-3’ tall and wide. Can tolerate full sun and dry soil, more so than any other Pycnanthemums. It will also thrive in partial shade.
Pycnanthemum virginianum- Mountain mint
A northeastern U.S. native. Clusters of small white flowers (occasionally some flowers will have purple spots) begin in July and continue into September. A good choice for moist soil, it will tolerate average garden soil but is the least drought tolerant of all the mountain mints. Full sun (if soil doesn’t dry out) or partial shade. 2-3’ tall 12-18” wide.
]]>
June is National Pollinator Month and one thing that every gardener can do to help support our pollinators is to plant native plants. At Natureworks, we carry an everchanging selection of natives, both straight species and our favorite cultivars. As I walked around the nursery yard this week (June 4-10, 2023), I was proud of the diversity of our offerings. This is not meant to be a comprehensive list but it will give you an idea of the type of plants we carry. If you are traveling from a distance and want something in particular, please call ahead as plants come and go VERY quickly in June!
Straight species
Actaea pachypoda- doll's eyes
Adiantum pedatum- maidenhair fern
Aesculus parviflora is a large, native shrub with large flowers in the summer that attract butterflies galore
Aesculus parviflora-bottlebrush buckeye
Allium cernum-nodding onion
Amelanchier canadensis- shadbush
Aralia racemosa- American spikenard
Asarum canadense- American ginger
Asclepias incarnata-swamp milkweed
Aslepias purpurescens-purple milkweed
Asclepias syriaca-common milkweed
Asclepias tuberosa-butterfly weed
Asclepias verticillata- narrowleaf milkweed
Aster linarifolius-stiff leafed aster
Aster novae-angliae- New England aster
Aster umbellatus-flat top aster
Baptisia sphaearocarpa- yellow dwarf false indigo
Boltonia asteroides- Bolton's aster
Carex pennsylvanica- Pennsylvania sedge
Callirhoe involucrata-poppy mallow
Comptonia peregrina- sweet fern
Dalea purpurea-purple prairie clover
Echinacea purpurea- Eastern purple coneflower
Geum triflorus-prairie smoke
Gilenia trifoliata-Bowman's root
Helianthus divaricatus- woodland sunflower
Hamamelis virginiana- autumn witch hazel
Helianthus tuberosus- Jerusalem artichoke
Ilex opaca- American holly
Iris versicolor- blue flag iris
Iris versicolor is our native blue flag iris
Liatris aspera-rough blazing star
Liatris scariosa var. novae-angliae--New England blazing star
Liatris spicata-dense blazing star
Lindera benzoin- spicebush
Lobelia cardinalis- cardinal flower
Meehania cordata is creeping woodland mint, a great native groundcover
Meehania cordata-creeping woodland mint
Monarda bradburiana-Eastern bee balm
Monarda fistulosa- bergamot, bee balm
Packera aureus- golden groundsel
Parthenium integrifolium- wild quinine
Penstemon calycosus- calico beardtongue
Penstemon hirsutus-Northeasterrn beardtongue
Polemonium reptans-Jacob's ladder
Pycnanthemum flexulosum- Appalachian mountain mint
Pycnanthemum muticum-smooth mountain mint
Pycnanthemum tenuifolium-narrow leaf mountain mint
Quercus alba-white oak
Quercus palustris-pin oak
Rhododendron arborescens- sweet azalea
Rhododenron calendulaceum- flame azalea
Rhododenron viscosum-swamp azalea
Schizachyrium scoparium-little bluestem grass
Solidago bicolor-silverrod
Solidago speciosa-showy goldenrod
Vaccinium angustifolium- lowbush blueberry
Vernonia noveborincensis- New York ironweed
Viburnum lentago- nannyberry
Viola labradorica-Labrador violet
Zizia aptera-Golden Alexanders
Our favorite native cultivars
Agastache foeniculum 'Blue Fortune'- anise hyssop
Arctostophyllos uva ursi 'Massachusetts'- bearberry
Aronia melanocarpa 'Ground Hug' - creeping black chokeberry
Aster ericoides 'Snow Flurry'- ground cover heath aster
Aster oblongifolius 'October Skies'- aromatic aster
Chamaecyparis thyoides 'Top Point'- dwarf Atlantic white cedar
Chelone obliqua 'Tiny Tortuga' is a dwarf turtlehead that blooms in the fall
Chelone obliqua 'Tiny Tortuga'- dwarf pink turtlehead
Chelone glabra 'Black Ace'- white coneflower (burgundy new growth)
Clethra alnifolia 'Ruby Spice'- pink summersweet
Cornus stolonifera 'Arctic Fire Red'- dwarf red twig dogwood
Echinacea purpurea 'Rubinstern'- Ruby star coneflower
Eupatorium dubium 'Little Joe'- dwarf Joe Pye weed
Heuchera villosa 'Autumn Bride'-alum root
Hydrangea quercifolia 'Munchkin'- dwarf oakleaf hydrangea
Hypericum kalmianum 'Gemo'- shrubby St. Johnswort
Ilex glabra 'Gem Box'- dwarf inkberry
Itea virginica 'Love Child'- dwarf Virginia sweetspire
Leucothoe axillaris 'Squirt'- dwarf hobblebush
Lysimachia lanceolata 'Burgundy Mist'
Monarda didyma 'Jacob Kline'- red bee balm
Myrica gale 'Lowboy'-sweetgale
Phlox paniculata 'Jeana'- summer phlox
Phlox stolonifera 'Sherwood Purple'- woodland groundcover phlox
Rhus aromatica 'Gro-Low'-fragrant sumac
Rudbeckia 'American Goldrush'- black eyed Susan
Tiarella cordifolia 'Running Tapestry'- foamflower
Vaccinium macrocarpon ''Pilgrim'- cranberry
What happens next?
I can take many weeks, even months, for these seeds to germinate outside. Be patient and don't lose faith! One day you will look down through the hole in the top of the jug and you will see little baby seedlings popping up! Let them grow for a while, until they get at least one or two sets of true leaves. When they look lush and vigorous, remove the tape, slowly easy the clump of soil filled with seedlings out of the jug, and place it in a shallow saucer or basin of water. Have flats of 3 or 4" pots ready, filled with high quality potting soil. Poke a hole in the center of each pot and carefully tease a seedling out and replant it in the pot. Water and move your babies to a sheltered, partially shady spot for a few days to harden off and then, gradually, move them into the sun to grow on until they are large enough to transplant into the garden. If you are very careful and experienced in transplanting seedlings, you could also try moving them directly into a prepared garden bed, spacing them according to the directions on the seed packet. Be sure to shade them for the first few days as they adjust to their new home. I often create a tent with hoops and floating row cover.
I am one lucky woman. I am tasked with buying ALL of the seeds for the Natureworks retail store. We are talking thousands and thousands of seeds. I spend long, lovely hours sorting through determinate and indeterminate tomatoes, climbing and bush beans, tall and short sunflowers, and every other flower, herb, and vegetable seed you can imagine. By the time I finally make my choices, days have gone by.
This year, I am very excited about some new varieties we will be stocking.
Purple Vegetables
I am suddenly on a kick to sell as many purple vegetables as I can find. Why? The purple color means they have more anthocyanins which are antioxidants with many health benefits.
Cool Cut Flowers
New Annual Flowers to Grace your Garden
This is just a SMALL number of the many new and exciting seed varieties we will have on our racks this year. Try something new, in fact, try a bunch of new veggies, herbs, and flowers. You will be thrilled when summer rolls around and your winter work pays off in bountiful harvests.
]]>
It is the middle of November, and the hard frosts have taken their toll on the herbaceous perennials in our gardens. Before we put the gardens to bed for the winter and retreat inside, it is wise to take stock and make plans for next year.
Fall is the best time to honestly assess what is working and what is not working in your landscape. It is all right there in front of you. It may be too late to dig, divide, and move plants around, but you can certainly mark your plants with permanent metal labels and a waterproof pen AND take digital pictures. Print the pictures as full sized 8 x 10's and then mark them up with your changes and ideas. If you are doing a big renovation, measure your garden and draw it to scale on graph paper. Note any plants that are remaining in place, list the plants that you want to dig up and relocate, and note any plants that you want to eliminate. That is EXACTLY the process that we are following with the Natureworks Demonstration Gardens this fall.
The renovation of all of the gardens in front of the shop was prompted by the prolonged heat wave and drought of the past summer. Our well started to give us trouble and we had to prioritize the potted plant stock over the gardens. That made us realize that the time had come to create RESILIENT GARDENS. Our goal is to gather plants that don't need a lot of water together. If we choose to plant moisture lovers, we will group them in one garden so that we don't waste water and can be much more targeted in any supplemental irrigation that we do. We also plan to add a lot more native plants and eliminate plants that we no longer use in our design work or that are no longer available in the trade.
If you want to do this work in your own gardens, here are some questions to ask yourself:
1. What plants gave you the most trouble in the past growing season? This could mean that they needed constant watering or that they kept falling over or just failed to thrive. Think hard about whether they should remain. Be honest with yourself and your ability to care for needy plants!
2. Are some plants taking over and becoming problematic? Even native plants can be too vigorous sometimes. In the Natureworks gardens, asters self-seed a lot. Many of them have to be removed in order to restore a sense of order to our beds.
3. Have weeds taken over? It is so easy for things to get away from us when the weather is super hot and uncomfortable. Suddenly, your plants are being choked by grass or mugwort or ground ivy or other garden thugs. Make a note so that next spring you can dig them up, get the weeds out of the roots, and replant them.
4. Does your garden offer good foliage structure throughout the growing season? That is one of the secrets to good design. Flowers are the frosting on the cake of the garden, but the leaves are what hold it all together. They can be green but pay attention to variegated, golden, burgundy, silver, and blue foliage plants as they can add excellent contrast and color all season long.
5. Are you striving to reach the 70% native plant threshold that Doug Tallamy suggests in his important book Nature's Best Hope? Take stock now of what percent of your trees, shrubs, and perennials are natives. Then, decide which non-natives no longer fulfill your needs and mark them for removal.
6. Sometimes, you fall out of love with a plant that you used to like. It happens all the time. Our tastes change and evolve as we evolve as gardeners. Give some serious thought to this, you might surprise yourself. I've seen people give up lilies because of the lily leaf beetle, hostas because of the deer...you get the picture.
7. Have some of your plants outgrown their allotted space? Have some of your shrubs been pruned so many times that they look awkward or clunky? Again, be honest, perhaps a bit ruthless. This is especially true when you look at your front foundation plantings.
8. If you were to draw a chart and track the succession of bloom in your landscape, is there a season that would be lacking in color? Many gardeners tell me that they wish they had more fall color. Others strive to improve their August garden with plants that thrive in heat and humidity. The time to track this is now, while the garden is fresh in your mind. Write your thoughts and notes down and then act upon them next spring. You will have the entire winter to explore new plant choices for these specific areas.
9. Did some plants surprise you and get a LOT taller than you expected? Are some plants so slow growing that they don't have a chance to compete with their more vigorous neighbors? When you print out your garden pictures, circle them and write down the problem. Think about where you can move them to next year where they might fit in better.
I hope that some of these ideas inspire you to take a good, long look at your landscape now so that you can spend the winter organizing, planning, and dreaming. Stay tuned to the Natureworks Demonstration Gardens Renovation Project for inspiration and advice.
Here are some pictures of our work in progress:
Nobody likes to work in the garden by the road as it is too noisy and dangerous. We are shrinking the width of this garden AND removing any plants that are not totally drought tolerant. Plants such as bearded irises will be moved here from all over the property. Native and drought tolerant plants such as Hypericum, Pycnanthemums, Eryngium yuccifolium, and more are being added.
Blue tape means dig up this plant and save it and then replant it in its new location. If we don't have time to replant this fall, they will be potted up and heeled in for the winter, well labeled of course!
This garden is being reduced at one end and widened at the far end. All tall plants are being relocated or eliminated to provide a better view of the shop from the road. Resilient, native plants such as Amsonia hubrechtii and Baptisia australis will remain.
]]>Fall is a glorious time of year to work in the garden. It is the ideal time to take stock of your perennial gardens, correct mistakes and problem areas, dig up, rearrange and divide existing plants, add new perennials and shrubs, and plant spring blooming bulbs. Fall is also the ideal time to start new gardens, especially if you want to use Passive Bed Preparation
(https://natureworksgardencenter.com/blogs/news/passive-bed-preparation)
and take advantage of all of the autumn leaves. As fall winds down and this work is completed, you will turn to the task of putting your garden to bed. Don't rush it! So many people start thinking about doing this in September when they should be thinking about fall gardening. Putting the garden to bed is a gradual process that begins somewhere around the end of October and continues right up until the ground freezes which in our part of Connecticut is usually around the end of December.
WHEN DO YOU CUT PLANTS BACK?
The rule of thumb is: "If it's yellow or brown, cut it down, if it's green, leave it alone." The life force of a plant is in its leaves during the growing season. As the weather gets colder, this life force is translocated to the root systems of the plants. When this happens, the leaves change color. Then and only then do you cut them down. If you cut off perfectly good green leaves, you will weaken the plant and possibly affect its vigor and blooming the following year. Consequently, you can't just simply say "today is the day I'm going to put my garden to bed...." Wouldn't you know that it's not that simple! Because plants die back slowly, at different rates, cutting back your plants is a GRADUAL PROCESS. Once you have a hard killing frost (somewhere between the middle and end of October), the tender annuals are history. The cold hardy annuals such as Calendulas and snapdragons are still gorgeous. The hostas, perennial hibiscus, balloon flowers (Platycodon), and many other herbaceous perennials have already changed color and can be cut down. So, every few days, I go through the borders, garden sickle and pruning shears in holsters on my belt, and cut back whatever has turned brown or yellow. The rest, I admire, enjoy, and leave alone. Perennials can take an amazing amount of frost! There are even quite a few late blooming asters, Aconitums, Helianthus, and Korean mums that begin blooming in late October- this is their season to shine! Some plants are also reblooming beautifully. Catmint (Nepeta) and roses are usually in bloom and very happy in November. So are the repeat blooming bearded and dwarf bearded irises. So don't rush the process. Enjoy your fall garden to the very end. Cut back only what is brown or yellow. Don't obsess about it! The plants will clearly tell you what to do!
EXACTLY WHAT DO I CUT BACK AND HOW DO I DO IT?
Plants in the perennial garden can be broken down into a few categories, all being treated differently in late fall...
1. Herbaceous Perennials
These are plants that truly die down to ground level at some point in late fall. Decades ago, the dominant paradigm was to cut every herbaceous perennial back to ground level and haul the debris to the compost pile. Now, we suggest that you leave some plant stems standing, especially those that have a pithy or hollow interior, as they are home to our native tunnel nesting bees. 15” is the recommended height to support these important native pollinators. You can also practice “chop and drop”, where you chop up your plant debris and drop them back on the ground as mulch. This returns a lot of nutrients to the soil and adds organic matter. This link explains the how and why of this important process:
Plants with wiry stems or those that turn to mush after a hard frost, your best bet is to cut them right to ground level. Use a garden sickle- you will find it is much faster, more efficient, and easier on your hands. You cut them back all the way to the ground, and nothing is left but stubs. Before you cut anything down, ask yourself “Will I know where and what this plant is next spring?” NOW is the time to label your plants with permanent metal markers using a waterproof, oil-based marker.
2. Herbaceous Perennials that maintain Basal Foliage
Many perennials lose all of their top growth, but when you go to cut the brown or yellow stalks down, you will find green, lush, healthy growth at the base of the plant. Following the rule above, you would obviously leave these alone! What that means is that you will still have the ground hugging leaves of the perennials left in the garden. They will be easy to spot in late fall and even the following spring. (I still think it's a great idea to label them properly with metal labels). Examples of these types of perennials are Oenothera, Salvia, Penstemon, and Scabiosa.
3. Plants that Remain UP into the Winter
Many of perennials just don't turn brown or yellow despite hard killing frosts. These plants remain up during the winter.
a. Some simply are very cold tolerant and their tops don't succumb to cold until they have been exposed to a few months of winter. Nepeta (Catmint) is a good example of this. You never get a chance to cut it back before the snow flies because it still looks good. Come the spring, it is a matted tangle and gets cut to the ground to make way for a new crown to grow. It will be clear to you if a plant is in this category. It will still look good when you are "done" with your garden. No problem. Deal with it next spring!
German or Bearded Iris fall into this category but they require special treatment. Even though their leaves are growing actively and look green and lush until Christmas, you must not leave them up all winter long as the foliage harbors the larvae of the Iris borer. So go right to your December calendar and write on it "cut down German Iris" somewhere around the middle of the month. Bag the leaves and discard them. This is the easiest and most efficient way to control their enemy, the iris borer. Trust me, they will be fine and will still bloom next year.
Note: All other irises are cut back when they naturally turn yellow. Do not leave Siberian or Japanese iris leaves standing all winter as mice or voles love to nest in their crowns and eat the rhizomes. Shave them down to ground level with your sickle.
b. Some plants maintain a woody trunk and should not be cut back hard in the late fall. Instead, they should remain up all winter long. For these plants I simply cut back the tops approximately 1/4-1/3 to keep the plants from rocking in the wind and to shape them. Many perennial herbs such as lavender, rue, germander, sage, as well as the flowering perennials Russian sage (Perovskia) and Montauk daisy (Nipponanthemum nipponicum) fall into this category.
c. Candytuft (Iberis) and Hellebores are early spring bloomers that are evergreen all winter long. I DO NOT CUT THEM BACK IN THE FALL. Candytuft goes into the winter with flower buds set on the plant. Cut it back after blooming, in mid spring. Hellebores have semi-evergreen foliage. They look good going into the winter. By late winter, the leaves look tattered and cutting them down is one of the first garden chores of the year, as soon as the snow melts. If you suspect that a plant is evergreen in your garden and its leaves look terrific in December, leave it alone. It can add winter interest to otherwise barren borders!
d. Most ornamental grasses are left up all winter long because they look stunning covered with snow and ice and add winter interest to the garden. Cut them back to within 12" of the ground in late March. Exceptions are ornamental grasses that may self-sow and become problematic.
e. Kniphofias (Red Hot Pokers) require a special treatment. DO NOT cut back their leaves in the fall. Instead, in late November, gather up and tie the leaves together with twist ties or twine. This keeps water out of the crown. In the spring, cut the foliage back to the base.
SEED PODS
The decision to remove or leave seed pods standing for the winter is based on many factors. If the seed pods of a plant feed winter birds (Echinacea, Helianthus, Rudbeckia), you may decide to leave them standing. If a plant has self-sown in your garden and you don’t want any more in that location, you should remove the seed pods as they ripen. You can drop the seeds in a new location if you want to add more to a different garden bed. Some seed pods are ornamental (Belamcanda, Rudbeckia maxima) and are often left up for winter interest.
FLOWERING SHRUBS
Flowering shrubs fall into two basic categories:
1. Shrubs that bloom on previous year's wood. These are spring bloomers whose buds are set the year before. NEVER prune these in the fall as you will prune off next year's flower buds. Examples are azaleas, lilacs, rhododendrons, and Fothergilla.
2. Shrubs that bloom on current year's wood. These are summer and fall bloomers. Even though it may not hurt them to be cut back in the fall, I usually wait to do so until spring so as to leave some more winter structure in the garden. Examples include butterfly bushes, St. Johnswort (Hypericum), Abelia, and rose of Sharon.
Hydrangeas are a complex category. The blue and pink snowball types (Hydrangea macrophylla) should be left alone and possibly even wrapped if they are in an exposed spot. The older varieties bloom off of last year's wood. Newer repeat blooming varieties bloom on old wood and new wood. Wait to prune them until mid-spring. Even though they look pretty dead by November, leave them alone! Smooth hydrangeas (H. arborescens) and panicle hydrangeas (the tree hydrangeas) bloom off of current year's wood. They are left up all winter and pruned in the spring. Oakleaf hydrangeas (H. quercifolia) set up their buds on the tips of this year’s wood. Do not prune them in the fall.
ROSES
I treat roses like flowering shrubs and leave them alone, cutting off only the wildest shoots, saving the heavy pruning and shaping until spring. In late fall, just before the ground freezes, HILL UP SOIL OR COMPOST AROUND THE BASE OF THE ROSES to about 12-18". This protective measure assures that even if the tops of the roses die down in an extremely cold winter, the plant beneath the hill will still be alive in the spring. This is not necessary for any roses that you have had in your garden and have proven winter hardy. It is especially recommended for newly installed roses until you see how they perform for you.
ANTI-DESICCANT SPRAYS
If your roses or broadleaf evergreens are in an exposed spot, or if you have recently transplanted them, it is wise to spray them in late fall with Wilt Pruf, an anti-desiccant spray made from pine sap. This will keep the plants from losing valuable moisture in the cold drying winter winds. Be sure your broadleaf evergreens go into the winter well-watered as an added extra protective measure.
LEAVES
It is not necessary to remove all of the leaves from your garden beds in the fall. In fact, unless your leaves are thickly covering the crowns of your plants, LEAVE THEM! Leaves not only add nutrients and organic matter to the soil, they also support all sorts of life in your yard. Many creatures such as bees and wasps, wooly bear caterpillars, non-migrating butterflies and moths, spiders, snails, worms, frogs, lizards, and turtles overwinter in leaf litter.
Read this article by the Xerxes Society about this topic:
https://xerces.org/blog/leave-leaves-to-benefit-wildlife
Consider your leaves as a valuable resource in your happy habitat. After raking thick layers of fallen leaves from your lawn, save them in a pile to use as mulch or allow them to decompose and form compost to enrich your garden beds. As leaf drop slows down and comes to an end, mulch the remaining leaves with your lawn mower. This will increase the organic matter and feed the soil, promoting a healthier lawn.
MULCHING
There are two different mulching chores in the fall.
1. If you have recently planted or transplanted your perennials or shrubs, mulch the soil around them immediately with leaves, shredded bark, or other organic mulch. This will keep the soil warm for a longer time and promote rooting well into late November. The longer plants root in, the happier they will be in the winter and the bigger they will be next spring!
2. AFTER THE GROUND HAS FROZEN (usually not until mid to late December in Connecticut) lay cut evergreen boughs over the entire garden, crowns and all. Apply this loosely, no more than an inch thick. The purpose of the winter mulch is to KEEP THE GROUND FROZEN!!!! This will then prevent the alternate freezing and thawing of the soil which causes the plants to heave up out of the ground, exposing their roots to the cold. Snow will also provide this protective blanket, but snow cover is not guaranteed in Connecticut! This is most important to do with newly installed gardens.
GARDEN SANITATION
If you have had issues with diseases such as rust on hollyhocks or botrytis on peonies, do not compost or chop and drop this debris. Instead, bag it and discard it.
]]>In an effort to provide horticultural information, these educational documents are written by Nancy DuBrule-Clemente and are the property of Natureworks Horticultural Services, LLC. You are granted permission to print/photocopy this educational information free of charge as long as you clearly show that these are Natureworks documents.
Some Variations on the Process
]]>
Now that the weather is cooling down, it’s time to think about bringing in your tender houseplants and herbs for the winter. The first mild frosts along the shoreline usually occur during the week of the full moon in early October. When you hear that the temperature is going to drop to the low thirties, plants can be easily protected by draping them with sheets or newspaper held on with clothespins. Once the threat of hard killing frost arrives (usually at the end of October) your plants should be in the house. Once inside, there are some important steps that you should take to insure their health and vigor...
First, be aware that when you "summer" your plants outdoors, you are exposing them to potential insect problems. They may look lush and healthy when first brought in, but it is very likely that hidden in their leaves are the egg cases of whiteflies or spider mites. I make it a practice to take preventative measures before a problem arises. Put your plants in the shower and wash them off well. Or, hose them off (top and bottom of the leaves) before bringing them in. Then, inspect carefully. Remove any brown, yellow, or diseased looking foliage. If you suspect insects, you should isolate your plants for a while. I use my back garage. It has a south facing window and even though it is not heated, it stays frost free while I work on the plants. If your plants do have insects, is a good standard practice to spray your plants before they come indoors. We use natural sprays such as Neem, Spinosad, or insecticidal soap. These are effective, yet safe for the environment. The general rule is to spray them three times in a two week period to be sure you control insects and eggs. Or, as an alternative, you can mix up a mild solution of dishwashing soap and water and give your plants a bath. You can't be too careful at this point! It is a lot easier to do this work outside on your deck on a beautiful fall day than in your living room in the dead of winter. An ounce of prevention is worth a pound of cure! Always inspect your plants at least once a week to look for insects and treat them immediately.
The other important job when you are bringing in your plants is to cut them back. I bring in tropical plants such as my hibiscus collection, my night scented jessamine (Cestrum nocturnum), and my collection of begonias. I also bring in a lot of succulents including Christmas and Thanksgiving cactus. Many people bring in geraniums from the garden. When you dig anything up to pot up and bring in, you inevitably dig up some of their roots. Balance this with a top pruning. This will create a bushier plant. Don't worry if you cut off a few flowers or buds. It will be worth it in the long run to have compact, full flowering plants in late winter when you need them the most. The same is true of tender perennial herbs. Rosemary, scented geraniums, and lemon verbena are not hardy in Connecticut. When you bring it in, give them a good haircut (and dry or cook with the clippings). Because the light levels are getting progressively lower at this time of year, cutting plants back helps them adjust to the change. If you notice a white powdery dust on your rosemary plants indoors, you probably have powdery mildew. Mix up one tablespoon of baking soda in one gallon of water and mist on the plants once a week. This takes care of the problem in a safe manner and doesn't change the flavor of the rosemary.
I do not recommend trying to bring in annuals such as basil or impatiens. Although they may live for a month or two indoors, they will decline in vigor because their natural life cycle is to die in the fall. Instead, take fresh cuttings of your impatiens and root them in water or perlite. Once rooted, plant them in potting soil and keep them in a bright, morning sun window. Pinch them at first to encourage bushiness. They will reward you with wonderful color all winter long. Consider sowing the seeds of annual herbs such as basil for a fresh winter crop. Grow culinary herbs on a sunny windowsill. Keep them well watered, especially in the dead of winter when the heat is on, drying out your indoor plants very quickly.
It is important to realize that it is a big adjustment for plants to come in from the outdoors. Try to get them in to the hot, dry air of your house gradually. Many people first put their plants on an unheated sun porch for a week or so to help them to acclimate.
Mist your plants with water often. An easier alternative is to place them on humidity trays: use large saucers that are 4-6” wider in diameter than the pots your plants are growing in. Add pebbles and then add water. Keep the water below the top of the stones as you never want your plants to sit in water. This is an easy way to increase the humidity on a constant basis. You will be surprised how quickly the water evaporates! This is good for your plants and for you!
Indoor plants are one of the joys of the cooler months. If you take a few simple precautions now, you will be rewarded with healthy, healthy houseplants all winter long.
]]>This list was updated October 19, 2022! Come in and shop our great selection of native plants!
Each spring, do you look with envy at the glorious bulb displays of your friends and neighbors, wishing that you had planted flower bulbs the previous fall? Now is your chance to plant a spring garden for the next year. Bulbs are one of the easiest and least expensive ways to achieve color in the garden or landscape. In my many years of helping people with their gardens, I have learned a few basic design fundamentals that I will pass on to you so that your investment in flower bulbs will pay off for you in a breathtakingly beautiful garden next spring . . .
* Always plant bulbs in masses or groupings, never singly. I usually use odd numbered groupings of 3 to 11 or more bulbs in a cluster. This is to achieve a dramatic effect. If you are only planting a few bulbs, keep them close together or you will dilute their effect.
* The farther away you will be viewing a bulb display, the larger the groupings should be. If your garden is across a large back yard, plant daffodils in drifts of 9-11 bulbs per cluster and scatter these large groupings throughout the garden. If your garden is by the front door where you will be viewing it up close, the groupings can be smaller.
* The smaller the bulb, the larger the grouping. I think nothing of planting 100 crocus or scilla in an area where I would put 25 tulips or daffodils.
* The longer I design with bulbs, the closer together I plant them! Often, suggested spacings on the care tag can be ignored and bulbs can be placed much closer together. I find this helps to heighten their effectiveness.
* Consider underplanting larger bulbs with minor bulbs to create interesting combinations. Classic pairings include red tulips with blue grape hyacinths, yellow daffodils with blue scilla, etc.
* Always pay attention to the bloom period of the bulbs. There are different bulbs that will bloom from March until June and beyond. Match early April tulips with other bulbs that bloom in the same time period. It’s all too easy to look at the pretty pictures and create combinations in your mind that won't work in reality because the actual bloom periods don't coincide. Let the Natureworks staff help you understand when our bulbs bloom here in Connecticut.
* Plant the bulbs in clusters BETWEEN the perennials in the garden. Because bulb foliage disappears by early summer, if you allow them their own large space, you will have unsightly gaps in the perennial garden. Instead, by planting them between the perennials, the bulbs will provide early dramatic color when the perennials are just emerging and the perennials will help to hide the ripening bulb foliage later.
* Try to match spring bulbs with early spring blooming perennials. This doubles the bulbs' effectiveness. Think white candytuft with pink daffodils; pink azaleas with purple May blooming tulips, red peonies with purple Alliums. You get the idea!
* Plant early bulbs between perennials and shrubs that sprout later in the spring and leave large gaps in April. Examples include butterfly weed (Asclepias), butterfly bushes (Buddleia), beautyberry (Callicarpa), and perennial Hibiscus.
* Avoid, if you can, rigid straight lines when you plant. Unless you are creating formal gardens, bulb plantings look more natural if they are done in sweeping curves or graceful drifts.
* Tulips last for a few years and then they should be replaced. Luckily, tulips are quite inexpensive and the blast of color that they contribute to the garden is really worth it. Think about how long it has been since your tulip displays were replenished. There are tulips that bloom in April and May and the flowering season can be coordinated to provide two months of blooms. Feeding your tulips when they emerge and after flowering prolongs their life span. Always remove spent blossoms and never let seed pods form.
Species tulips are true perennials. Many of them have small, star-like flowers that should be planted in large clusters or drifts. We have many species tulips that come up in our gardens year after year.
* Daffodils are true perennials and increase over the years. They are also deer resistant! Daffodils bloom in April thru mid-May and come in many sizes and colors. We carry many late blooming daffodils and lots of very sweet miniatures for rock gardens and entry way gardens.
*Alliums are extremely popular. They are also deer resistant and provide dramatic color LATE in the spring, in late May, June and even July. They are a very welcome addition in combination with the late spring and early summer blooming perennials.
* There are many delightful minor bulbs that give you color in February, March, April, and beyond. Minor bulbs simply mean the bulbs are small and diminutive - it certainly doesn’t refer to their importance!! Early spring color is a balm for the winter weary soul. I know it’s hard to imagine that feeling now, but believe me, these little gems are so welcome after the cold and gray winter months.
Chionodoxa (Glory of the Snow) can be planted in masses directly into the lawn for a blue carpet. This is an amazing sight. They self-sow and spread quickly over the years.
Snow Crocus, also called “species crocus”, bloom in early March, a few weeks before the giant crocus. They often bloom right through late snow storms!
Scilla siberica (Siberian squill) is one of the truest blue spring bulbs. They combine beautifully with April tulips and spread quickly over the years. Pushknia is also a diminutive, early, true blue flowering bulb that naturalizes easily.
Iris reticulata is a charming miniature iris that blooms in March with soft blue or purple flowers.
Winter Aconite is a lovely yellow spreader that is one of the first minor bulbs to bloom, often in February.
Snowdrops are February and March bloomers. They tell us “Spring is around the corner!” They are vole and deer proof, naturalize easily, and are excellent perennials. They will bloom in sun or shade. Always plant some near your door so you can enjoy them up close.
Hyacinthoides hispanica and Hyacinthoides non-scripta are called “Wood Hyacinth” because they bloom and spread so well in shady, woodland situations. They make great cut flowers and flower in May.
* Did you know that there are FALL blooming bulbs? We carry Colchicums - a giant form of pink crocus that blooms in early September, and we also carry SAFFRON CROCUS, lavender crocus flowers that bloom in late October. Saffron is harvested from the stigma of the flowers. It’s so much fun to grow these as they surprise everyone by their late blooming season and by the fact that you can pick saffron from the flower!
Deer proof bulbs include:
Daffodils, Alliums, Fritillaria, Snowdrops, Leucojum (summer snowflake) and Colchicum.
The best protection for all other bulbs is to add Repellex Systemic to each planting hole and again in early spring as deer-susceptible bulbs emerge. To protect against deer browsing, spread Deer Scram and spray the buds with Deer Stopper every three weeks. You can join our email Deer Blast to get a reminder.
We will be glad to help you plan your spring bulb garden. Please do not hesitate to ask for assistance from our trained staff. We want your spring garden next year to be all you have dreamed it could be!
In an effort to provide horticultural information, these educational documents are written by Nancy DuBrule-Clemente and are the property of Natureworks Horticultural Services, LLC. You are granted permission to print/photocopy this educational information free of charge as long as you clearly show that these are Natureworks documents.
]]>First up is one of my favorite yellow daisies of all time. Rudbeckia subtomentosa 'Henry Eilers' has it all. Blooming August through September, the flowers have the cutest quills at the end of each petal. The common name is aromatic coneflower. The slightly scented leaves make this plant very deer resistant. It is also very drought tolerant. The blossoms make great cut flowers and last a very long time in a vase. Henry grows about 5 feet tall, but I never let that happen. I always give him a hard pinch in June to keep him around 3 feet in height so he never needs staking. Enter 'Little Henry', a compact form of 'Henry Eilers' that naturally tops out at 3 feet without any pinching at all.
Speaking of quilled flower petals, another line of seriously beautiful September blooming perennials are Mammoth Mums. This is a line of hardy chrysanthemums bred in Michigan. They are naturally short, full, and compact and bloom quite early for a perennial mum. I have actually observed 'Yellow Quill' in bloom in the middle of August, as it is one of the longest blooming varieties in the group.
Asters are the mainstay of the September perennial garden, especially New England and New York asters. 'Purple Dome' is a compact form of the normally taller New England asters. Growing 18-24" tall, it rarely needs staking and makes a good landscape plant near the front of the garden. Monarch butterflies rely on asters for nectar as they migrate. New York asters are much shorter, very compact and have thinner leaves. They also bloom in September and work well in sun or dappled shade. One great way to add New York asters to your gardens is to put them in mixed containers along with fall annuals and then plant them in the landscape in late fall.
Right now, my gardens are filled with blooming Vernonias (ironweeds) of many sizes. The taller form (V. noveborincensis) is over 6 feet tall, towering above the plants in my lower garden. It is constantly visited by bees, butterflies, and hummingbirds. I also grow V. lettermanii 'Iron Butterfly' with narrow, delicate foliage and the same purple, fuzzy flowers. This blooms in September and continues well into October. I give this plant one pinch in June to keep it extra full and it then tops out at about 18-24" my garden, a rounded dome absolutely smothered in flowers. In between is V. x 'Summer's Swan Song'. It has thin, fine textured foliage and it grows to 3 feet tall.
One last plant to intrigue you. This is Sanguisorba tenuifolia 'Atropurpurea', also called burnet. I have grown this variety for decades and I love it because it has such an unusual form AND it makes a fabulous cut flower. It will bloom in my garden until hard frost.
These are just a FEW of our favorite fall bloomers. There are so many wonderful plants to choose from to enhance your second season garden. When you come to Natureworks for a visit, be sure to ask a staff member to help you plan your fall garden for succession of bloom. We are happy to help!
]]>
Plants on this list have survived the two month heat wave and severe drought of the summer of 2022. In most cases, they did so without any supplemental watering. In a few cases, one or two deep soakings made them revive quickly. Some of the reasons these plants are drought resistant are that they have swollen storage roots such as tubers or corms or that they have an extremely deep and large root systems.
We welcome your comments on this list as we work together to create more resilient gardens.
Perennials
Achillea-yarrow
Aconitum- monkshood
Agastache- licorice mint
Allium- ‘Millenium’, ‘All Summer Beauty’, thunbergii ‘Ozowa’
Amsonia-blue star
Anaphalis-pearly everlasting
Anemone nemerosa- wood anemone
Anthemis tinctoria- perennial Marguerite
Arabis- rock cress
Armeria-sea thrift
Asclepia tuberosa-butterfly weed and Asclepias verticillata-whorled milkweed
Aster ericioides, laevis, oblongifolia, umbellatus- asters
Aurinia-basket of gold
Baptisia-false indigo
Belamcanda-blackberry lily
Boltonia asteroides
Calamintha-calamint
Callihroe involucrate-poppy mallow
Campanula poscharskyana- bell flower
Caryopteris divaricata ‘Snow Fairy’- herbaceous blue mist shrub
Cerastium-snow in summer
Coreopsis-tickseed
Corydalis- rock harlequin
Crambe maritima-sea kale
Dalea purpurea-purple prairie clover
Delosperma-ice plant
Dendranthema-perennial chrysanthemum
Dianthus-pinks
Dicentra- bleeding heart
Digitalis-foxglove
Disporum flavens-yellow fairy bells
Echinacea-coneflower
Epimedium-barrenwort
Erigeron- including Erigeron pulchellus ‘Lynnhaven Carpet’- fleabane
Eryngium-sea holly, rattlesnakemaster
Euphorbia-spurge
Gaillardia-blanket flower
Gaultheria procumbens-wintergreen
Gaura
Geranium- especially G. macrorrhizum
Gypsophila-baby’s breath
Helianthemum-sun rose
Helianthus tuberosus- Jerusalem artichoke (other perennial sunflowers may survive a drought but look unsightly if not watered at least once or twice)
Heliopsis-false sunflower
Helleborus (may need one or two deep soakings but will revive)
Heuchera- coral bells, alum root
Hosta
Iberis-candytuft
Inusla helenium- elcampagne
Iris germanica, Iris pallida ‘Variegata’, Iris sibirica, Iris pumila
Kalimeris integrifolia-Japanese aster
Kniphofia-red hot poker
Lathyrus vernus-spring vetchling
Leucanthemum ‘Becky’-Shasta daisy
Liatris-gayfeather
Lychnis coronaria-rose campion and L. chalcedonica-Maltese cross
Maclaeya cordata-plume poppy
Mertensia virginica- Virginia bluebells (summer dormant)
Mitchella repens- partridge berry
Nepeta-catmint
Nipponanthemum nipponicum-Montauk daisy
Oenothera- evening primrose
Opuntia-prickly pear
Pachysandra procumbens-native deciduous pachysandra
Paeonia-peony (both herbaceous and tree)
Papaver orientalis- Oriental poppy (summer dormant)
Penstemon-beard tongue
Parthenium integrifolium-wild quinine
Perovskia-Russian sage
Persicaria polymorpha-Giant fleeceflower
Phlox subulata-creeping phlox, May pinks
Physostegia virginica-obedient plant
Platycodon-balloon flower
Podophyllum peltatum-mayapple
Polygonatum-Solomon’s seal
Potentilla-herbaceous cinquefoils such as P. tridentata, P. x tonguei
Prunella vulgaris-heal all
Rudbeckia-black eyed Susan
Salvia-ornamental sage
Sanguinaria canadensis-bloodroot (summer dormant)
Sedum- stonecrop
Sempervivum- hens and chicks
Solidago-goldenrod
Stachys byzantina -lamb’s ears
Stokesia-Stoke’s aster
Symphytum-ornamental comfrey such as S. grandiflorum, S. ‘Hidecote Blue’
Tanacetum parthenium-feverfew
Verbascum-mullein
Vernonia-ironweed
Veronica peduncularis ‘Georgia Blue’
Waldsteinea-barren strawberry
Yucca filamentosa
Zizia- Golden Alexanders (may need one good soaking, will revive)
Herbs
Artemesia
Hyssopus-hyssop
Lavandula-lavender
Mentha-mints
Origanum- oreganos both culinary and ornamental
Pycnanthemums- Mountain mints
Ruta gravaeolens- rue
Salvia-culinary sage
Santolina
Symphytum-comfrey
Tanacetum- tansy, feverfew
Teucrium-germander
Thymus-thyme
Shrubs
Most evergreen shrubs are quite drought tolerant as they have a waxy coating that helps them retain water. Broadleaf evergreens have more leaf surface to transpire water than needle evergreens.
Abelia grandiflora-glossy abelia
Abeliophyllum distichum- white forsythia
Amorpha canescens-lead plant
Arctostophyllos uva-ursi- bearberry
Azalea mucronulatum- Korean azalea
Aesculus parviflora-bottlebrush buckeye
Baccharis halimifolia-salt bush
Buddleia-butterfly bush
Calluna-heather
Chaenomeles- quince
Comptonia peregrina-sweet fern
Calycanthus -Carolina allspice
Caryopteris-blue mist shrub
Cotinus-smokebush
Cytisus-Scotch broom
Daphne
Erica-spring heath
Hibiscus syriacus- Rose of Sharon
Hypericum-St. Johnswort
Indigofera-indigo bush
Kolkwitzia amabalis- beauty bush
Lagerstroemia- crape myrtle
Leptodermis oblonga
Lespedeza- bush clover
Lonicera fragrantissima-winter honeysuckle
Myrica pensylvanica- bayberry
Rhus-sumac Rhus aromatica ‘Gro-Low’, Rhus copallinum, Rhus glabra, Rhus typhina ‘Tiger Eyes’
Spirea-both spring and summer blooming type
Syringa- lilac
Vitex-chaste berry
Xanthorhiza simplicissima-yellowroot
Ornamental Grasses
Andropogon
Bouteloua gracilis ‘Blonde Ambition’-blue gramma grass
Calamagrostis-feather reed grass
Carex ‘Ice Dance’
Eragrostis-love grass
Festuca glauca-fescue
Helichtotrichon-blue oat grass
Liriope-lilyturf
Molinia-moor grass
Muhlenbergia-muhly grass
Panicum-switchgrass
Schizachyrium-little bluestem
Sorghastrum nutans- Indian grass
Sporobolis heterolepsis-prairie dropseed
]]>My favorite fall blooming tree is Seven Sons tree (Heptacodium miconioides). It has 7-tiered panicles of fragrant white flowers that begin in late August and continue into September. After the flowers finish, the sepals turn a bright coral pink, offering another full month of color. This tree has silvery-white exfoliating bark that makes it a standout in the winter landscape. Because it blooms on current year's wood, it can be pruned each spring to keep it to a manageable size.
If you are looking for a shrub that will turn heads in the fall, plant a beautyberry (Callicarpa dichotoma 'Early Amethyst'). The flowers on this plant are barely noticeable- clusters of tiny pale pink blooms clothe the stems in August. But once the berries mature, you won't be able to take your eyes off of them because they are intense, dayglow, PURPLE! This is an arching shrub that should be pruned back hard every spring and can be kept 3-5' tall year after year. Beautyberry will grow in sun or shade and it is very deer-resistant. There are many new introductions with burgundy foliage as some with white berries.
Another excellent berrying shrub for fall interest is Symphoricarpos. I used to call this snowberry as the shrubs I knew as a child had big, plump white berries. Now, it is so exciting to see PINK berried forms such as 'Proud Berry' and 'Candy' (shown above). These are complex crosses between various native Symphoricarpos species and are classified as coralberries in the trade. Growing 3-4' tall and wide, these versatile shrubs are hardy to Zone 3. Late summer, dangling bell flowers become fall berries which are not edible but often eaten by the birds in late winter. They are very deer resistant and will grow in full sun or partial shade.
Fall gardens would not be complete without a wide variety of asters. A majority of the asters that we carry at Natureworks are natives. They come in colors of blue, purple, pink, deep rose, white, and lavender. Asters are vital to feed our late season pollinators and beloved by migrating monarchs.
A few of our favorite asters include:
Aster laevis 'Bluebird' (Symphotrichum lavae)- this is called the smooth aster as the leaves are oval and smooth. Bright blue flowers in September on 3' tall plants if you pinch this perennial hard in June. An excellent native selection that will grow in sun or part shade.
Aster oblongifolius 'October Skies' (Symphyotrichum oblongifolium)- the aromatic aster is very easy to grow in full sun or dappled shade. The scented leaves makes this native species very deer resistant. Large, rounded domes of sky blue flowers cover the plants in October. One hard pinch in June assure you will not have to stake this plant. 'Raydon's Favorite' (shown below) is very similar but begins blooming a week or two later and lasts into November.
Aster lateriflorus 'Lady in Black' (Symphyotrichum lateriflorum)- the calico aster is a native species that has burgundy new growth and burgundy stems. A bit greener in summer, the leaves turn back to burgundy in the fall and are topped with thousands of tiny white daisies with lavender centers that are constantly covered with pollinators. Will reach 3-4' tall with a hard pinch in June.
Aster umbellatus (Doellingeria umbellata)- the flat topped aster is a wonderful, reliable, very hardy native aster found all throughout New England. A dome of white daisies with yellow centers begins in mid-August and continues until early October. Pinch once in June and it will grow to 3-4'. Leave the back half alone and it will reach 6 feet and start blooming a few weeks earlier. Beloved by monarch butterflies and native pollinators.
Aster novae-angliae 'Alma Potschke' (symphyotrichum novae-angliae)- New England asters are THE native perennial to support migrating monarchs in the fall. This beloved variety has been in the trade for decades and has brilliant, hot pink daisy flowers with yellow centers. Pinch hard in June and plants will grow 3-4' tall and not need staking.
These are just a FEW of our favorite fall bloomers. There are so many wonderful plants to choose from to enhance your second season garden. When you come to Natureworks for a visit, be sure to ask a staff member to help you plan your fall garden for succession of bloom. We are happy to help!
]]>Hydrangea paniculata is a very old-fashioned plant that has been used in our gardens for centuries. When I was first designing gardens, we simply referred to them as Pee Gees. That stood for Hydrangea paniculata 'Grandiflora', the standard tree hydrangea in the industry. This species of hydrangea is totally hardy all the way up to Vermont, USDA hardiness zones 3-7. There are NO issues with this plant not blooming as the flowers are set up on new wood each spring. Pruning is simple- cut as hard as you want every year in April. Panicle hydrangeas have white flowers and H. paniculata 'Grandiflora' turns pink as the weather cools down, in late summer into early fall. The flowers can be cut fresh and immediately place in water or, once they have turned pink, can be cut, tied together, and hung upside down in a cool, dark place and be dried for fall and winter arrangements.
Panicle hydrangeas have come a LONG way since my early days of garden designing. Now, they are available in a mind boggling array of varieties. Some are dwarf, reaching a mere 2-3 feet tall and wide. Others are early bloomers, flowering in June and going from white to red or pink in July. Some start out lime green instead of white and then turn to pink. Many have single flower panicles, with sterile flowers that attract pollinators.
Hydrangea paniculata plants can be purchased in two forms. The shrub form is a plant that has multiple stems coming up out of the pot. Some folks treat these as shrubs and cut the entire plant back very hard in early spring, keeping it short, full, and bushy. Others select out 3-5 of the strongest, upright growing stems and train them to be multi-stemmed, small trees. This is done by continuously removing the lower side branches (limbing up) until the canopy reaches the desired height. Then, the rounded top is thinned and pruned back each year. Occasional replacement trunks are allowed to grow up to keep the plant vigorous. The second form is called a "standard" or tree form. Think of a lollipop and you will get the picture. These are grown for many years at the nursery by selecting a single, strong, upright trunk, growing it up a stake until it reaches the desired height, then topping it to make it branch. After that, the top is pruned continuously until the crown reaches a saleable size. Tree form hydrangeas cost more money because of the extra time and labor needed to produce them. They are sold staked and, once planted, a thick, sturdy, tall oak stake should be added and the trunk should be tied in multiple places. Always tie TO THE STAKE and then loosely loop around the trunk so the tree can move in the wind.
Do panicle hydrangeas come in blue? NO. Can you change the color of their flowers by changing the acidity of the soil? NO. White, pink, deep rose, red, and lime green are their color palette. Do panicle hydrangeas need full sun? No. They will grow just fine in partial shade. Deep shade isn't good as they will become week and not have many flowers. Can panicle hydrangeas be planted in wet soil? No. All hydrangeas need moisture in the soil in dry spells, but soggy soil that holds water for long periods of time will not work. Do panicle hydrangeas get a lot of insect and disease pests? No. Their biggest pest are deer. If you train the canopy up high enough you will eventually eliminate that problem! But panicle hydrangeas kept as low shrubs are just as susceptible to deer browse as all the other species.
Here are a few of the most popular, newer varieties to showcase the wide diversity available.
Hydrangea paniculata 'Limelight'- (shown below) Large panicle flowers open a soft lime green in August, fading to soft pink in the fall. This is a much sought after, full sized tree hydrangea that will grow 6-8' tall. The fresh flowers are sought after in the floral industry.
'Little Lime' has the same flower power but grows 3-4' tall and 4-6' wide.
Hydrangea paniculata 'Vanilla Strawberry'- (shown at the top of this post) Giant, towering flowers of pure white open in late July, turning to bright pink in mid-August and finally deep strawberry pink in the cool fall weather. Grows 6-7' tall and 4-5' wide. Ideal for dried flowers, wreaths, and arrangements.
Hydrangea paniculata 'Quickfire'- This variety blooms in late June with upright, open white panicles that quickly turn to rich pink. The fall foliage is exceptional- deep maroon red and orange (shown below). Grows 6-8' tall and wide.
'Little Quickfire' has the same flowers, growing only 3-5' tall and wide.
Hydrangea paniculata 'Bobo'- (shown in the Natureworks gardens below) An excellent dwarf with large, full sized, white flowers in August that turn to pink in the fall. 3' tall, 3-5' wide.
Hydrangea paniculata 'Firelight Tidbit'- A super dwarf that starts blooming in mid-July with pure white flowers that turn pink and remain colorful for three months. Grows a mere 2-3' tall and wide.
The introduction of new varieties of panicle hydrangeas offers gardeners one of the most exciting developments in the world of horticulture. There are over 25 varieties listed by our suppliers! There is a panicle hydrangea for every landscape situation.
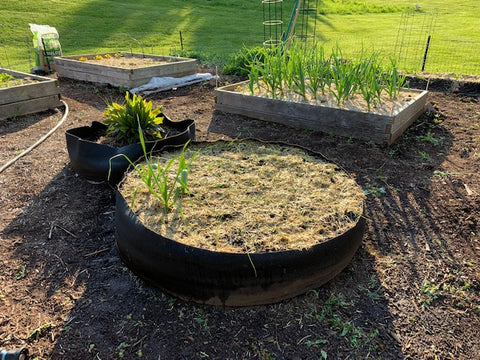
]]>This week, I harvested the last of my potatoes. That leaves me with an empty 12' x 4' raised bed. Heaven! I am going to plant GREENS. I will use floating row covers to protect my kale, spinach, and Swiss chard plants from cabbage moth caterpillars and leaf miners. The seeds I sow this week will give me greens until the snow flies, possibly beyond if I give them extra protection.
I also just emptied a 20 gallon Smart Pot, harvesting the carrots I had planted in late spring. I immediately planted golden beets and they sprouted in a few days! I love to grow root crops in Smart Pots as my soil is heavy clay. Even in the raised beds, no matter how much I amend the native soil, I still can't grow the beautiful, big carrots, radishes, and beets that I can in Smart Pots.
Speaking of radishes, their seeds go in the ground at the beginning of September as they like it very cool. Last year I discovered a wonderful radish secret- sow the seeds extra thick and EAT the THINNINGS! It turns out that radish greens are absolutely delicious. Consequentially, I sowed radish seeds as microgreens in the house under grow lights all winter long.
So, to summarize, here are the seeds you should plant at this time of year for fall harvests:
Arugula]]>
First up are your container gardens. We are talking pots on the porch or deck as well as anything growing in Smart Pots or Big Bag Beds. These are watered often, especially when it is very hot. Regular watering leaches out nutrients. I feed anything in containers every other week. I alternate between using Neptune's Harvest Fish Emulsion/Liquid Seaweed and a granular organic fertilizer such as Sustane or fish based Coast of Maine.
Look at the different types of organic fertilizers in this picture. I know it can be confusing to understand which ones to choose. Start with the number formulation. The first number stands for NITROGEN. This makes leaves grow lush and healthy. If you are growing leafy plants (lettuce, cabbage, Swiss chard, Coleus, ferns) then use a fertilizer like Sustane Flourish which has a formulation of 8-2-4. The first number is much higher than the second number and encourages leaves.
If you are growing plants for flowers and fruit or vegetables, you will want to feed with a formulation that has a higher second number which represents phosphorus. This increases flowering which then increases fruits and vegetables. The granular Sustane 4-6-4 in the picture above is ideal for this.
Granular fertilizers are simply sprinkled on the surface of your pots and scratched in. Sustane Flourish is a powder that is mixed with water. Simply read the directions for each individual type of fertilizer.
Neptune's Harvest brand of liquid fertilizer have been used by organic gardeners for years. It is a trusted brand that really works. It does have a fishy smell but plants love it. I water my containers with Neptune's Harvest every other time I fertilize. You will notice a few different types on our shelves. The formulations are tweaked for specific types of plants- roses and flowers, tomatoes and vegetables, and all-purpose. Don't discount the power of the seaweed in these fertilizers! It encourages the all-important feeder roots to grow which makes plants much more efficient at taking up water and nutrients.
The result of feeding your containers is that they will continue to flower and thrive all summer long as you can see by some of the pots on the steps of my deck late last summer. It is SO important.
Smart Pots are an amazing way to grow plants because air goes through the fabric and causes quick, healthy root growth. But, as the weather heats up and the roots begin to fill the Smart Pots, you will find yourself watering every other day. Be sure to keep to your feeding schedule. You can mix some Coast of Maine Quoddy lobster compost in with the Sustane granular organic fertilizer when you scratch it into the surface of the soil to add extra organic matter. You can also mulch the top our your Smart Pots with Mainly Mulch shredded straw to help keep the moisture in.
In the ground, not everything you are growing needs to be fed at this time of year by any means! I pay attention to my vegetables in late June, especially after lots of heat and rain. I sidedress my plants with the same granular organic fertilizer/compost mixture at least once a month. I also liquid feed my vegetables with Neptune's Harvest Tomato and Vegetable liquid fertilizer. I pay particular attention to cucumbers (they love to be fed!) and corn.
I do not feed my perennials and shrubs after the initial spring feeding unless they are repeat bloomers (such as many daylilies). The early spring feeding of compost and organic granular fertilizer is enough for the season. But roses are a different story! After your roses have bloomed, you should cut off the dead flowers and open prune them for a second time. Usually this happens in mid-July, but some of my roses have finished already in this crazy year. I always feed them after this pruning, using compost and granular organic fertilizer. This helps them grow fresh, healthy, new leaves and set up their next round of buds.
I also feed any annual flowers I have growing in the ground, especially my beloved zinnias, cosmos, and dahlias. I follow the same alternating schedule in June and July and then back down in late summer. Annuals complete their life cycle in one growing season. Give them the care and feeding that they love and they will reward you with many flowers and a long bloom time.
If you ever have any questions about what to feed and which organic fertilizers to choose, ask a Natureworker! We LOVE to talk about how you can grow a healthy, happy organic garden and we can match you with the organic fertilizers that will work the best for you.
]]>Cutting Back your Plants in June
There are many perennials that we grow in our CT gardens that benefit from cutting back in June. We used to call this "pinching" but in reality we are cutting a fair amount off of each plant- pinching has always meant nipping out the tip of the new growth.
Why do we do this?
The first and most important reason is to cause plants to branch at a lower height and NOT NEED STAKING later in the summer or fall. This is such a time saver!
When you cut back a plant, you set back its bloom time by about 2-3 weeks. Take this into consideration when you are planning succession of bloom in your gardens.
Avoiding staking plants is only ONE benefit of cutting back many of your perennials in June. Cutting back in stages will also prolong the bloom time (double or triple it) and will often hide the unsightly part of the plant after blooming.
This is one of the most exciting advanced maintenance techniques a gardener can learn.
The concept is to create a layered effect. The back ½ of the plant is left alone to grow to its normal height and bloom at its normal time. The front half of the plant is cut back by 1/3-1/2 in May or June, at the latest early July. The exact time of cutting back depends upon how quickly the plant grows and what time during the summer or fall a plant blooms. Early bloomers such as Shasta daisies (Leucanthemum), bee balm (Monarda), and yarrow (Achillea) are cut back in Southern Connecticut in May as the growth is elongating but before the buds are setting. Late bloomers such as asters and mums can have the front half of the plant cut back as late as early July. The result is that the back of the plant blooms first at its normal time. The front (pinched or cut back) half of the plant then begins to bloom 2-3 weeks later. As the back half is finished, it can be deadheaded, it will be hidden by the blooming front half. This doubles the bloom time and serves to detract the eye from the dying flowers and declining foliage of the back half of the plant.
Shown above is Eupatorium 'Little Joe'. The left picture shows the plant after cutting back. The picture on the right shows the result in late August. Note the big flowers on taller stalks in the back and the smaller flowers on shorter stalks still to bloom in the front. This is a good example of layering and doubling the bloom time.
This is Rudbeckia 'Herbstonne'. It has been pinched. The open flowers on tall stems are blooming in early August. The second layer will bloom in September on shorter stems.
Another great benefit of this June perennial pruning is to hide the "ugly legs" of many perennials. What does this mean? Some perennials, by the time they bloom, have “ugly legs”, i.e. they loose the lower leaves or the lower leaves become unsightly. Therefore, when you view them the flowers are pretty but the foliage detracts. By cutting the front of a plant in stages, you can create a stepped or layered effect to the front foliage of the plant, hiding the ugly legs. Try cutting the very front to 6”, the next level to 8-12”, the next level 15-20”, etc.
There are two additional ways to use these cutting back techniques to your advantage:
a. Vacation cutting back – If you know that a plant will bloom when you will be away on vacation, you can manipulate its bloom time by cutting the entire plant back. An example is perennial hibiscus, which normally blooms in August. If you cut this plant back by 1/3 – ½ in early July, you will create a shorter, branched plant that will not begin flowering until two to three weeks later than its normal bloom time. i.e. the very end of August or the beginning of September. Thus, when you return from vacation after Labor Day, your plant will just be starting its peak bloom time.
b. Cutting back to achieve peak bloom for a party, wedding or garden tour. Use the same concept described above to time blooming of perennials for special events. For example, if you are planning a September wedding in your garden, you can purposely cut back your late July and August bloomers hard in late June or early July. Then, these will bloom in tandem with your regular September bloomers.
These techniques were gleaned from studying the book The Well Tended Perennial Garden by Tracy Disabato-Aust. If you grow perennials, you must study this book. At Natureworks, we consider it our "bible".
]]>
At Natureworks we like to say that EVERY DAY IS EARTH DAY. We are all about learning all that we can about our environment and passing that knowledge on to our customers of all ages. We must be good caretakers of our surroundings in order to create and sustain healthy habitats. What better way to celebrate than to let our Nature inspired collection of books fuel your child's curiosity for the great outdoors and give them an appreciation of the world surrounding them.
Here are a few suggestions and Natureworker favorites to help guide your them and encourge your child to learn about the earth and the magic that surrounds them. Happy Earth Day!
"We are the Gardeners" a sweet keepsake book by Joanna Gaines and Kids with soft toned illustrations tells of how the family came to garden by a small fern their father found at a local hardware store. Sadly that fern expires from overhydration but they are determined to prevail and get another one after reading up on the plants needs. The story progresses and charts the lessons learned regarding care, pests and taking ownership of something which can be quite rewarding.
Another wonderful choice is by one of our beloved authors of all time, Dr. Seuss is a book called "I am the Lorax" based on his book "The Lorax". Wonderfully whimsical play on words about a serious subject, removing trees from the world and how devastating the effects can be. Teaching each child can help keep our forests safe from harm. "Save the Truffula Trees!"
"Give Bees a Chance" by Bethany Barton. What can we say we love bees! The book tells of the importance of bees and describes how there are 25,000 different kinds of bees to love! The author teaches children in a comical way about how bees make honey and aid in the growing of plants and food. This book is a keeper the front and back inside jacket lists many different types of bees with illustrations of how they look.
"The Hike" by Alison Farrell is a beautifully illustrated story of three young explorers who while on a hike together discover all the magical things nature has to offer. They find berries to eat as a snack while navigating a path to their destination and sketch the flora and fauna while exploring together. Their sense of accomplishment when their journey is completed is empowering!
These selections in addition to others at our shop will remind children of the importance of taking care of the earth and the environment surrounding them.
Happy Earth Day!
By Susan Johnson
]]>First of all, they are so easy to bring home and set up. They fold up flat and are lightweight. Even the biggest Big Bag Raised Bed will fit in any car. They last for years and years. I have had a few of my 20 gallon Smart Pots on the south side of my house for over five years. I leave them out all winter, filled with my wonderful organic soil. In the spring, I remove the top few inches of the old soil and spread it in the garden. Then I add some fresh Quoddy Coast of Maine compost and some Sustane organic granular fertilizer, mix it all in, and I am ready to replant. My oldest ones now have pretty moss growing on the outside which makes them even cooler looking in my opinion!
Smart Pots are made of a fabric that breathes. Oxygen flows into the root systems of your plants which makes them very healthy. Because of this, the Smart Pot company says that their pots "air prune" the roots. In other words, the roots don't spiral around in a circle like in a solid, plastic pot. Instead, they branch into finer and finer roots when they reach the sides. The finer roots do all the work of absorbing the water and nutrients from the soil. That is why plants grow so well in Smart Pots!
Smart Pots are made in the United States. It feels so good to be growing food in a container that was produced in this country. And the soil we use to fill the Smart Pots is ALSO made in the U.S.A. Coast of Maine's Castine Blend Raised Bed Mix is the ideal organic soil to fill your Smart Pots. It has everything already in it including compost, worm castings, lobster and kelp meal, greensand, biochar, and beneficial mycorrhizae. It is OMRI listed for organic farming.
Once your plants start to grow, you will find that you will be watering your Smart Pots quite often. This is because of the big, healthy, efficient root systems and the fact that air flows into the soil very easily. It is part of my routine to deep soak them every few days, sometimes daily when the heat of the summer really kicks in and my plants are monstrous.
I use a lot of 20 gallon Smart Pots. One 2 cubic foot bag of Castine Blend happens to be the EXACT amount needed to fill one 20 gallon Smart Pot! Our heavy duty tomato cages also fit perfectly inside of a 20 gallon Smart Pot. That means you can instantly set up a growing system for one tomato plant, sugar snap pea vines, cucumber vines, pole beans, or perhaps fill the Smart Pot with mixed lettuces or kale.
In this picture, you can see that we slit a few holes in the sides of this 20 gallon Smart Pot and inserted some edible Nasturtium plants! There is ONE tomato plant in this pot with curly parsley added to the base.
I rotate vegetable plant families every year. If I had tomatoes in my Smart Pots last year, I would plant cucumbers this year and beans the next. It makes it so easy to organize your rotations. Plus, if you want to cover your cucumber vines with floating row covers as the seeds are sprouting and the vines are growing, all you have to do is wrap the heavy duty tomato cage with floating row covers and clip on some wooden clothespins. When the cucumbers start to flower, you unclip the row covers and let them start producing fruit.
The latest Smart Pot introduction is the Big Bag Raised Bed. This essentially is an instant garden, 6 feet long and 16" wide. We plant one up every year at Natureworks and it makes a great demonstration bed to show our customers how easy it is to grow food.
In my own backyard, I stacked three Big Bag Beds in consecutive sizes into a "birthday cake" formation, filled it with Castine Blend, and planted everbearing strawberry plants. This was solution to a strawberry tower. As the runners of the strawberry plants are formed, I simply have to pin them down to the layer below.
Get Smart. Get Smart Pots and grow lush, healthy, beautiful organic gardens.
]]>
Peas need to be planted in early April so they can grow their vines to the top of the fence before it gets too hot, which makes them flower and form peas.
April is prime time for cool season crops. Not only can these edibles tolerate the cool nights and light frosts that are sure to occur in early spring, most of them NEED these conditions to thrive.
A good example is peas. They should be planted as early as the ground can be worked. Why? Because, when the weather is cool, peas grow leafy vines. Lots and lots of them. As soon as it gets really hot, they flower and then, make peas. If you plant them too late, they will only grow a little bit before making peas and you will get a very meager crop. I love to grow edible podded sugar snap peas. I grow a variety that gets tall. I put strong 6 foot oak stakes in the ground, attach chicken wire fencing all the way to the top with a staple gun, and then plant my seeds. My goal is to get them to the TOP of the fencing before they even think of flowering. I have done this every year I have been gardening, always in April. And I always get an amazing crop in July, enough to eat fresh and to freeze.
Another cool season crop must be planted in April are radishes. Again, they won't work if you plant them in hot weather. High temperatures cause them to bolt to seed. When this happens, the delicious swollen radish roots don't form. Radishes only take 28 days from seed to first harvest. I like to plant them many times in April to double or triple my harvest. Then I have to wait until fall to plant them again (but that is another blog post!)
I planted lettuce seeds and cilantro seeds together in this urn. Both can take the cool temperatures of April.
Lettuce also needs to be planted in the cool months or it too will bolt to seed. Lettuce can take temperatures down to just about freezing. If the forecast is that it will get colder than that, you simply have to protect your lettuce plants with floating row covers or cotton sheets. Never use plastic as it will transmit the freezing cold temperatures! I like to plant lettuce seedlings AND lettuce seeds at the same time. The same goes for escarole, spinach, and kale. When the main heads of these delicious greens are harvested, the baby seedlings will have room to grow and mature.
Kale is the ideal cool season crop. It can be direct sown or, better yet, plant seedlings and seeds to double your harvest. Don't forget the floating row covers to keep the cabbage worms off!
Lots of plants in the kale family are also cool season vegetables. April is the time to plant out pre-started seedlings of broccoli, cabbage, cauliflower, broccoli raab, and Brussel sprouts. You can't direct seed them in April as they won't have time to mature before the weather gets too hot. If you didn't get around to starting them indoors ahead of time, don't worry. Natureworks carries an excellent selection of cool season vegetable seedlings.
You should start direct sowing carrot seeds as soon as the ground can be worked in April. Keep sowing for the next few months and then again in late summer for a fall crop.
Mustard greens, leeks, onions, scallions, sorrel, parsley, sage, and rosemary can also be planted in April. You can direct seed carrots and beets as well.
Look at how gorgeous the kale and spinach are growing under the floating row covers. We pulled it back to harvest. We use wooden clothespins to clip it to the wire row cover hoops. These two crops were planted in April and have doubled in size the first month.
Your two best tools for planting in April are a soil thermometer and floating row covers and hoops. The soil thermometer is the only accurate way to know if your soil is ready for seeds and seedlings. If you rush it and the soil is too cold, the seeds may not sprout and the seedlings may be stunted or perish. The floating row covers are a quick way to protect plants from cold snaps. Some cold crops really need row covers to protect them from pests- kale, broccoli, cabbage, cauliflower, spinach, and Swiss chard are best planted from day one beneath row covers. But, having extra floating row covers at hand, along with old fashioned wooden clothespins, means you can quickly toss together a bit of frost protection that won't damage the rest of your plants that are not already under cover and then remove it the next morning when it warms up.
Give cool season crops a try this spring...and again this fall!
]]>
The most economical way to grow dahlias is to buy the tubers. This also has the benefit of offering you a much greater diversity of choices. Tubers are usually for sale in late winter and early spring. There are two ways to grow them.
If you started your tubers ahead of time, wait until late May or early June to plant them in the ground. Gradually get them used to the outdoor (harden them off) before planting. Prepare the soil and amend as described above. At this point, plant them a bit deeper, adding an additional 4 inches of soil to the top of the root ball.
As your dahlias grow, many gardeners pinch them in June to encourage fuller, bushier plants.
Most dahlias will grow quite tall and need support. At Natureworks, we love to place our heavy-duty tomato cages around the dahlias as soon as we plant them. You can also use thick, heavy stakes, but be sure not to drive the stake too close to the plant or you will damage the tubers. Do not underestimate how big your dahlias will grow!
We feed our dahlias every couple of weeks with Fish emulsion or Sustane. In late July, we also mix up Coast of Maine lobster compost and granular organic fertilizer and topdress around the plants.
Dahlias grow slowly at first, but as the summer starts to draw to an end, you will see them really take off and start to flower prolifically. Cut the flowers for the house. Deadhead spent blossoms. Keep tying up any shoots that outgrow the cage or the stakes- they are quite brittle in strong rain or winds.
Dahlias must be dug up and stored indoors over the winter. Wait until the tops have been completely killed by a hard frost. Then, wait one week before digging them so the eyes can start to develop a bit. Cut off the frozen growth, leaving 6-12” of stem intact. I try to dig them on a sunny day. I use a digging fork, loosening the soil all around the plant, and gently ease them out of the ground. I ALWAYS use a loop tag or flagging tape and label each one by looping it around the tuber. You really want to know which dahlia is which, especially if you grow different sizes, colors, and shapes! I place them on a sunny, warm surface (in my case, I use my stone courtyard). After drying them all day, I move them under cover to my back garage. After they have been under cover drying for at least 3 days, I then bring them into my cellar to process them for storage. I want them to be dry, but not yet starting to shrivel. Keep your eye on them as they are drying- temperature and humidity will determine how long it takes.
Another alternative is to simply grow your dahlias in big pots and leave them in the pots to dry out. Then you can store them, pot, soil, and tubers, all as one in the cellar. After 2-3 years of doing this, you should plan on dividing the dahlias the following spring, putting half back and replanting the rest in another pot or in the ground.
I am lucky enough to have an old-fashioned root cellar with a dirt floor in my 1800’s house. Not everyone does. You want to store your dahlia tubers at around 40-45 degrees. If you have a cellar with a furnace, find a spot against an outside wall as far away from the furnace as possible.
There are many ways to store them. I used shredded paper. Some folks use peat moss or, wood shavings. Others plunge them into sand. The goal is to keep them happily dormant, not to let them shrivel up and dry out completely nor to let them be too moist and start to rot. I store mine in big plastic bulb crates. Others use onion bags. Many use cardboard boxes. Before placing the tubers in storage, cut off any small roots, damaged or rotten pieces and carefully brush off or remove any loose pieces of dry dirt. I often use a pencil to gently prod the dirt off but I don't worry if some is left as long as it isn't wet.
You can divide your tubers in the fall before storing them or in the spring when you take them out of storage. I prefer to do it in the spring. Every division must have a tuber and an eye (the growing point where new shoots start).
Check your dahlia tubers at the beginning of February. Remove and discard any moldy pieces and gently mist them if they are dry. Then put them back into storage. By mid-late March, when you check on them, you will likely start to see new buds starting to swell. At this point, you can start the process all over again of starting them indoors in pots. If you are simply going to plant them directly in the ground in late May, leave them in storage, checking on them often as the spring progresses.
]]>
Gardening by the moon is an ancient practice. It probably began with the Egyptians or Babylonians. There were no calendars or clocks in ancient days, but the phases of the moon and the constellations in the sky were watched and followed. In the early part of the 20th century, studies were done by Rudolph Steiner and his followers. The Biodynamic movement uses the moon phases and the constellations as a guide for planting. Today, our easy to use calendar makes this ancient practice accessible to every gardener. A sample page is shown below. You basically look at the calendar, read what you should be doing on various dates, and try to plan accordingly.
What if it rains or you are too busy or something else comes up on the days you were planning to plant your radish seeds? I try and plan ahead, but if it doesn't work out, I plant as soon as I can. I ALWAYS mark on my plant label the date and whether or not I planted in sync with the moon or not. That way I can track my success with this method.
If you look on the label above, you can see I planted zucchini seed on July 26, 2020 w/the moon. I use a little crescent moon symbol on each label to keep track. You can figure out your own method but I find it very interesting to see how the crop turned out.
The pull of the moon is very strong due to its close proximity to the earth. We all know that the moon has an effect on weather patterns, ocean tides, and human behavior. It also has an effect on plants. The moon cycle takes 29 days to complete. The increase or decrease in moonlight controls the amount of moisture in the soil and controls ground water. It also controls the movement of fluids in plants, the water in our bodies, and the ocean tides. This is all due to gravitational pull. Tides are the highest at the time of the new moon and full moon because that is when the sun and moon are lined up with the earth- they are on opposite sides of the earth at those times.
Here are a few basic terms to understand:
The WAXING MOON is an increasing moon and follows the new moon each month. During the waxing moon the water table rises, plants take up nutrients faster, and seeds germinate quicker
The NEW MOON is the dark moon. On the exact day of the full moon, it is best not to plant as the “tidal forces” are confused as the “tides turn”.
The FIRST QUARTER is the ideal time to plant annual crops that bear above ground and produce seed outside of the plant (ex. lettuce, kale).
The SECOND QUARTER is the time to plant crops that bear fruit above ground and produce seeds inside the plant (ex. peppers, tomatoes, cucumbers). This is also a good time to graft fruit trees. As the full moon approaches, water increases in plants. Harvest juicy berries and vegetables that are mostly water such as cucumbers and succulent greens.
The FULL MOON is usually marked on traditional calendars. Just as with the new moon, on the exact day of the full moon, it is best not to plant as the “tidal forces” are confused as the “tides turn”. It is a good day to harvest herbs as their essential oils are their most concentrated. Fragrant flowers are the most fragrant on the day of the full moon.
The WANING MOON is a decreasing of light and takes place after the full moon each month. The water table is being drawn down. Sap runs slower. Plants orient themselves towards their roots.
The THIRD QUARTER is the best time to plant root crops, and bulbs. It is also the best time to plant perennials, biennials, trees, vines, and anything that needs to develop a strong root system. Prune plants in the third quarter and they will lose much less sap from the cut end.
The FOURTH QUARTER is a period when growth in plants is discouraged. It is the ideal time to weed, thin, eliminate pests, mulch, turn compost, and turn over garden soil. The water table has been pulled downward to its lowest point.
The 12 signs of the Zodiac (constellations) also affect how plants grow. Planting time is determined by when the moon actually passes through the various constellations and the positioning of both the moon and the constellations in the night sky. This changes every few days.
FIRE SIGNS are Aries, Leo, and Sagittarius. This is a barren sign, good for harvesting (not planting), seed production, weeding, tilling, cleanup, and pest control.
EARTH SIGNS are Taurus, Virgo, and Capricorn. This sign is ideal for planting root crops.
AIR SIGNS are Gemini, Libra, and Aquarius. As the moon passes through these constellations in the night sky it is the best time to plant flowers.
WATER SIGNS are Cancer, Scorpio, and Pisces. These are the most fertile and productive signs of the Zodiac and are ideal for leaf growth.
As the moon passes in between the various constellations, it is considered “void of course” and it is a time for rest. This is clearly marked on the Gardening by the Moon calendar.
Scientific research has proven that the water in plants is affected by the phases of the moon. It is particularly true in plants grown in organic soils without the use of chemical fertilizers or pesticides.
As you learn to garden in harmony with the cycles of the moon, keep records. Try experiments and write down your results. Be observant and you will find that your garden will be very productive.
Consider this old adage:
'"With the waxing of the moon, the earth exhales.
With the waning of the moon, the earth inhales"
Fast forward to 2021 and I can see that the organic movement has grow a lot in the past 40 years. But that is no longer my ONLY reason for growing my own garden. Yes, I am thrilled that the way I care for the land in my care has built a very happy habitat for all sorts of creatures. But I also know that the mere act of growing is a creative endeavor. I learn something new every day. I am always curious about the next interesting vegetable or flower around the corner. I bet you feel that way too.
Every year, I choose a bunch of new plants to try. This year is no different. Luckily for me, I was once again in charge of ordering all the seeds for Natureworks this winter. Talk about a dream job! In the process, I chose some of new plants for 2021.
‘Mad Hatter’ peppers are the first thing that I knew I had to grow. This is how I describe them in our Online Store:
“Mad Hatter is probably the coolest new pepper variety we have had in years. The instant I saw it I thought of one we sold years ago called 'Umbatuba Cambuci'. 'Mad Hatter' is not a hot pepper, it is sweet with just a tiny bit of spice. What I remember about this shaped pepper is how easy it was to pop them open and clean them. Plus, they look like little spaceships and are really fun to grow. Perhaps they could have a place of honor in a container on your deck? Peppers are a warm season crop and must be started indoors in late March/early April. Don't even THINK about planting them outside until all danger of frost is over and the soil has warmed up. -Nancy”
Tomato Ten Fingers of Naples (photo courtesy of Fruition Seeds)
Next up is Tomato ‘Ten Fingers of Naples’. Another aspect of our winter work at Natureworks is to contract with our organic growing partners to grow our organic vegetable seedlings. They all have their own lists that they offer to us and we pick from those lists, for sure. But then we buy and SEND them more seeds, specifically selected by us because, well, WE want to offer them on our benches (and grow them ourselves). This variety of tomato made the cut, at my urging I must admit, as I am always on the lookout for a better paste tomato in CT than ‘San Marzano’ which just seems to me to need a much hotter, longer growing season.
Broccoli 'A Foglia D'Ulivo' seed (photo courtesy of New England Seed)
My husband loves bitter greens, and he especially loves broccoli raab. I have been fairly successful at growing it, but he still doesn’t think it’s bitter enough. Enter Broccoli ‘A Foglia D’Ulivo’ seed. This is the famous Italian “Olive Leaf” broccoli raab, so called because the leaves resemble those of an olive tree. Cut off the entire top of the plant and eat leaves, stem, flower buds and all. The leaves are very tender and bitter tasting. This plant has much higher leaves to flower bud ratio than other broccoli raab varieties. Perfect!
Every seed you sow, every plant you grow, is a personal choice. That is the beauty of it! You get to choose whatever strikes your fancy and try it. If you grow from seed, it is a very inexpensive way to experiment. Even if you buy pre-started seedlings, you will still get a lot of food and the invaluable experience about learning about a crop you have never met before.
]]>
Peppers are tropical, warm season plants that must be started indoors in advance.
But for many types of plants, you do have a choice. You can start lettuce ahead of time OR you can sow seed directly in the ground. Same with escarole, kale, Swiss chard, marigolds, zinnias, and much more. As you read the various descriptions of the seeds on our website, you will find that each of them describes your basic options. BUT, as an experienced gardener, I have some of my own opinions about which plants I think should just simply be direct sown. Let me tell you about three of them.
Cucumber seedlings sprout inside a floating row cover wrap in late June
I invite you to use our Online Store as a teaching tool to learn more about growing plants from seed. And don’t forget to look at the many handouts available on the Natureworks website:
https://naturework.com/garden-info/handouts/
Many of them have recently been updated, and many more are newly added. Natureworks is dedicated to education and it is our mission to help YOU, our valued customers, to be successful ORGANIC gardeners.
]]>Look at the photo above. I direct seeded radishes in my garden. They are WAY too close together and need to be thinned...fast.
Thinning is critically important in order to grow full sized, healthy plants. With large seeds like beans and sunflowers, if you are patient, you can drop the seed in trenches spaced the proper distance apart because they are easy to handle. But the smaller the seed gets, the harder it is to sow it at the proper spacing. Some seeds are so tiny, they look like specks of dust.
These carrots need thinning!
Carrots are the first crop that I learned to thin- the hard way. The first few times I planted carrots they were tiny. A disaster. I realized that if I summon up the courage to ruthlessly thin them, I would never have a successful crop. So, I did it and at first, I felt guilty discarding all those tiny, baby plants that I had so lovingly raised. But the results were so good, I was hooked. I FINALLY grew big, juicy, delicious carrots. And I have never looked back.
I adore golden beets, for the delicious roots and the edible greens. If I didn't thin them after the seedlings emerged, they wouldn't end up being this gorgeous.
Beets are another vegetable I love to grow that I must thin once they germinate. Beets are a bit easier to sow as the seed is bigger BUT each beet seed is actually a few seeds in one. If you are very patient sowing beet seeds, you can wait until the seedlings have a few baby leaves and then EAT the thinnings as baby beet greens. But you can’t let them go too long or your beets won’t form properly. Instead of pulling them up, consider cutting them with small scissors so you don’t disturb the beets you leave in the ground.
Look at this great harvest of 'Mikado' baby turnips that I picked last spring. They were thinned after they sprouted and harvested when they reached the size of radishes.
One way to deal with direct sowing seeds that always need thinning is to mix the seed with some fine sand. This dilutes the rate at which the seed is sown and reduces the thinning dramatically. Use a 4-1 ratio of sand to seed, shake well, and sow. Play around with this method and eventually you will find you will be thinning less!
Read your seed packet to find out how far apart you should thin your seedlings. All seed packets have this information. I never use a ruler, I just eyeball the distance, but I now seriously do pay attention. Sometimes I just use my judgement, thinking: “How big is a radish going to get?” and thin accordingly!
I have spent this post talking about thinning vegetable seedlings, but it is also important for flowers. The number one flower that MUST be thinned are breadseed poppies. If you just let them grow too close together, you won’t get the beautiful big, dramatic flowers that we post pictures of all the time.
]]>When people think about planting a butterfly garden, their primary focus is on butterfly nectar plants. Although these plants are extremely important in attracting butterflies to your yard, they are only half the equation! Before metamorphoses, a butterfly must first be a caterpillar. Butterflies lay their eggs on very specific host plants, called their larval food plants. In many cases, only one type of plant or one family of plant will do for a certain butterfly. If that larval food plant is absent, the butterfly will move on. Spicebushes (larval food plant for the Spicebush Swallowtail) are one example of this phenomenon. Others include Milkweeds (Asclepias family) as larval food plants for Monarchs, and Queen Anne’s Lace (and related plants such as carrots and parsley) for the Black Swallowtail.
What this basically means is that once the eggs hatch into hungry caterpillars, they will eat the host plant (and only the host plant) before forming a chrysalis and then turning into a butterfly. Therefore, what you may consider “weeds” in your garden may be the link in the chain, the lifeline that encourages butterflies in your yard! AND, if you panic and quickly poison all caterpillars that you see without first considering who they are and what they may become, you will also be wondering where the butterflies went! KNOW YOUR ENEMY is the battle cry in organic gardening!!!
The second part of butterfly gardening is providing nectar sources for the butterflies themselves. Since butterflies only fly in warm weather (85 degrees and above), they are summer creatures sipping nectar from summer flowers. Some of their favorites are the Butterfly Bush (Buddleia sp.), Butterfly Weed (Asclepias tuberosa), Gaillardia, Purple Coneflower (Echinacea), Asters, Sedums, Verbena, and Lantana. Butterflies are nomads, and take off if their needs are not met. To keep them around, plan your garden to have a long succession of bloom of key nectar plants, spanning the season from June through September. The list of butterfly nectar sources is very long and you can design a beautiful garden around these choices.
Because butterflies need warmth, they love to “bask” in the sunlight on heated rocks. So be sure to include stone walls or decorative rocks, stone or brick pathways in your butterfly garden plan. If your garden is in an exposed spot, try to provide a windbreak by enclosing it with a fence or hedge. Full sun is the ideal site for a butterfly garden.
As you learn more about butterfly gardening, you will grow in your appreciation of the complex interactions between all living things. You will think twice before cutting down ALL the wild areas of your yard, instead consider them sanctuaries for butterflies and birds. You will be more careful and will avoid spreading poisons to control insects as you gain a new respect for the tenuous balance of nature that we are constantly seeking to understand.
For a link to this handout, with plant lists included, click here https://naturework.com/wp-content/uploads/2017/02/Butterfly_Gardening_including_lists.pdf